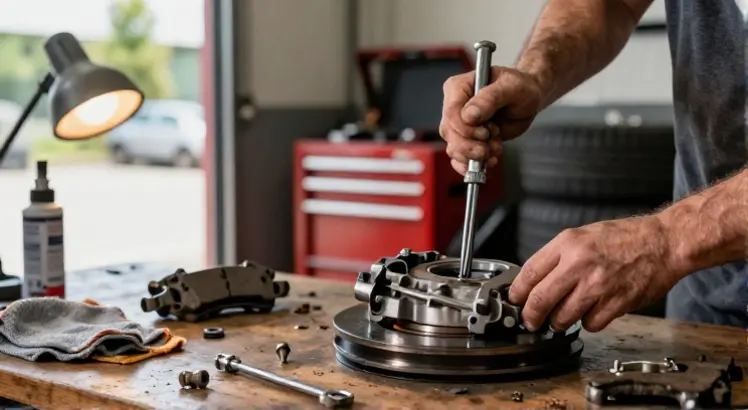
Pushing a brake piston back into its caliper housing can feel impossible without the right technique. If you have ever squeezed a pad against a stuck piston and cursed under your breath, you are not alone. A brake piston tool transforms this frustrating job into a predictable, clean maneuver.
While many DIY mechanics try to improvise with a C-clamp or channel locks, these makeshift methods often damage the piston, tear the dust boot, or lead to a dragging brake. Understanding how to use brake piston tool correctly saves you repair money and keeps your braking system operating safely.
This guide covers the essential steps, the difference between tool types, and the safety checks you must perform before pushing the pedal down again.
Understanding the Brake Piston and Why It Needs Special Tools

Orion Motor Tech 35 Piece Disc Brake Caliper Tool Kit
Check PriceThe brake caliper piston is a hydraulic cylinder that extends outward when you press the brake pedal, clamping the pads against the rotor. When you install new, thicker brake pads, the piston sits too far out to fit over the fresh material. It must be retracted fully into the caliper bore.
Front calipers typically feature a simple push-back design. Rear calipers, however, often integrate a parking brake mechanism. This mechanism requires the piston to be twisted while it is depressed, not just crushed inward. Ignoring the twisting requirement will shear the internal threads and destroy the caliper.
Using a dedicated brake piston tool ensures even pressure distribution. The tool contacts the piston face perfectly flat, reducing the risk of cocking the piston sideways and scoring the cylinder wall.
Types of Brake Piston Tools You Will Encounter
Before learning how to use a brake piston tool, you need to identify which style your vehicle requires. Using the wrong tool type turns a simple brake job into an expensive tow to a mechanic.
The Standard Piston Compression Cube

Orion Motor Tech Dual Piston Brake Caliper Compressor
Check PriceThis is a small, 3D-printed-looking metal cube attached to a 3/8-inch drive. Each face of the cube has a different pattern of pins or protrusions. It is designed specifically for rear brake pistons with notches or indentations.
You attach the cube to a ratchet extension, seat the correct face into the piston grooves, and apply clockwise rotation while pushing. The cube is cheap, compact, and gets the job done on most passenger cars. The downside is the lack of leverage, which can make stubborn pistons a workout.
The Disc Brake Piston Rewind Kit (Multi-Piece Set)
Orion Motor Tech 35 Piece Disc Brake Caliper Tool Kit
Check PriceThis professional kit consists of a threaded forcing screw, a handle, and multiple adapter plates. The plates offer various pin configurations to match European, Asian, and domestic calipers. You select the correct adapter, mount it on the forcing screw, and turn the handle.
This design provides massive mechanical advantage. The screw mechanism simultaneously rotates and pushes the piston flat against the caliper body. For a mechanic or a serious DIYer, this is the definitive solution for integrated parking brake calipers.
The Heavy-Duty Piston Compressor (Front Caliper Tool)

Orion Motor Tech Single Dual Quad Piston Brake Caliper Compressor
Check PriceThis tool looks like a caliper bracket with a screw-driven press plate. It straddles the caliper body and uses a large wingnut or screw handle to push the piston straight in. It is perfect for large truck calipers or multi-piston fixed calipers.
Because it does not rotate the piston, it is generally only suitable for front calipers or rear calipers without a threaded parking brake actuator. It applies brute force safely, but you must still be cautious about alignment.
Preparing Your Vehicle Before Compression
Never jump straight to the compression step. Neglecting preparation causes fluid spills and mechanical damage.
- Reservoir Cap Removal: Open the brake fluid reservoir cap under the hood. This releases pressure in the system. Stopping without doing this can send pressurized fluid backward through the ABS modulator.
- Fluid Level Monitoring: Wrap a clean shop rag around the reservoir neck. As you push the piston in, fluid displaces back up to the master cylinder. If the reservoir is already full, it will overflow. Brake fluid destroys paint instantly, so suction some fluid out with a turkey baster if necessary.
- Dust Boot Inspection: Inspect the rubber boot surrounding the piston. If it is torn or dry-rotted, the tool can pinch and rip it further. A torn boot invites dirt, causing internal corrosion.
- Caliper Slide Lubrication: Before retracting the piston, ensure the caliper slides freely on its guide pins. If the caliper is seized on the pins, compressing the piston will only mask the real problem, leading to uneven pad wear.
How to Use Brake Piston Tool on Front Calipers (Non-Twist Style)

Orion Motor Tech Speedy Brake Caliper Compressor Black
Check PriceFront floating calipers dominate most passenger vehicles. These pistons are hollow and push straight in without rotating. While a C-clamp is often mentioned, a proper front caliper compressor tool prevents any offset loading.
Step-by-Step Front Compression Guide
Step 1: Leave the Old Inner Pad in Place. Retrieve the old worn brake pad that sat against the piston. Place it back against the piston face. This creates a flat, sacrificial surface for the tool to press against, protecting the piston crown from gouges.
Step 2: Position the Compressor Tool. Fit the fixed plate of the heavy-duty compressor against the backside of the caliper body. Align the pressing plate against the old brake pad or directly on the piston face if you are certain the tool is perfectly flat.
Step 3: Apply Slow, Even Pressure. Crank the forcing screw slowly. Watch the piston retreat into its bore. If the pressure spikes and the piston stops moving, stop immediately. Do not force it, you are likely fighting corrosion. Rock the screw back half a turn and try again slightly.
Step 4: Clean the Exposed Piston. Once retracted, wipe the exposed piston circumference with brake cleaner and a lint-free cloth. Debris left on the piston will shred the inner seal when you brake later.
How to Use Brake Piston Tool on Rear Calipers (Twist-In Style)

Orion Motor Tech 2-in-1 32pc Disc & Drum Brake Service Tool Set
Check PriceThese calipers are the trickiest part of a brake service. Because the internal parking brake mechanism uses a screw-type actuator, the piston has a helical thread on the back. Pushing without twisting strips this thread instantly.
Using the Cube Adapter
Identify the notch pattern on the piston face. It is usually a cross shape, two dots, or three notches. Match this pattern to a face on the cube tool. Insert a 3/8-inch ratchet into the cube. Apply firm pressure toward the caliper while rotating the ratchet clockwise.
Very few pistons require counter-clockwise rotation, always test clockwise first with very light pressure. The tactile feedback will tell you immediately if the piston is threading in smoothly or binding.
Using the Professional Rewind Kit
Select the correct adapter plate for your piston and secure it to the forcing screw with the locking nut. Place the tool bridge over the caliper lugs. Slowly turn the handle clockwise while maintaining firm downward pressure.
If the tool tries to “skip” out of the notches, you need more downward force. A helper holding the caliper steady while you turn the tool makes this step significantly easier. The moment the piston face sits flush with the caliper housing, you have successfully retracted it.
Critical Tip: Check the orientation of the piston notches. They often need to align with a small pin on the back of the new brake pad. If the notches do not line up, the pad will not seat flat. Adjust the piston rotation slightly once it is fully retracted to align the tabs.
Common Mistakes That Cause Tool Failure or Caliper Damage

Orion Motor Tech Universal Brake Caliper Spreader Tool
Check PriceSkipping a diagnostic step because the tool seems to fit leads to catastrophic results. These are the most frequent errors mechanics see when inspecting failed DIY brake jobs.
- Forcing a Seized Piston: If the piston feels rock hard and refuses to move, the caliper is likely seized internally. No amount of tool leverage will fix this, it will simply explode the tool or tear the piston face. The caliper must be replaced or rebuilt.
- Neglecting the Twisting Requirement: Using a front-tool C-clamp on a rear threaded piston destroys the parking brake mechanism within four turns of the screw. The pedal will go soft, and the caliper will need replacement.
- Overflowing the Master Cylinder: If you topped off the brake fluid between pad changes, pushing the pistons back will push that fluid out of the reservoir cap. This corrosive liquid will strip the paint on your strut towers and brake booster.
- Slippage Under Pressure: Greasing the tool face or the piston face to “help” it slide is dangerous. The tool needs friction to grip the notches. Grease promotes skipping and rounds off the adapter pins.
Post-Compression Checks and Final Assembly
Using the brake piston tool correctly sets the mechanical stage, but the hydraulic and functional checks are what prevent a test-drive accident.
After retracting the piston, install the new pads and hardware immediately. Do not leave the piston exposed to shop dust. Reinstall the caliper onto the bracket using a high-quality synthetic brake grease on the slides.
Before starting the car, pump the brake pedal slowly five to six times. The pedal will sink to the floor on the first push. This is normal while the piston travels out to meet the pad. Do not drive until the pedal is firm and high. Finally, check the fluid level at the master cylinder and cap it tightly.
During the test drive, perform a few gentle stops to bed the pads. Listen for grinding. If you hear a rhythmic scraping, a piston might be partially stuck because it was retracted cock-eyed, usually due to improper tool fitment in the earlier step. Stop and re-inspect immediately.
Exploring Quality Components for a Complete Brake Job
Compressing the piston is one part of a friction replacement. The longevity of your work depends on the quality of the surrounding components. Using worn-out rotors alongside new pads will cause vibration and uneven piston loading.
If you are looking to upgrade the stopping power of your vehicle, it is worth looking at premium options. Many experienced home mechanics prefer sourcing the best brake rotors and pads as a matched kit to guarantee compatibility. When pads and rotors wear together unevenly, the piston extends further on one side, making future retraction with your tool significantly harder.
If you have a Honda, the transformation is even more noticeable. A fresh set of best brake rotors for Honda Odyssey combined with correctly seated pads will eliminate the judder that makes these vans nervous during long stops. Just be certain that your rewind tool adapter fits the specific notch pattern on the Honda rear caliper, as it tends to wear down easily if the wrong cube face is used.
According to AA1Car, the condition of the caliper housing itself is often overlooked, and internal corrosion can reduce the effectiveness of even the most powerful compression tools.
Frequently Asked Questions
Can I use a C-clamp and a block of wood instead of a proper tool?
You can on standard front calipers, but only if you remove the pad and press only on the piston crown. A block of wood risks splitting and canting. For rear calipers with an integrated parking brake, no amount of wood will help, you absolutely must rotate the piston with a proper tool or you will destroy the threads inside the caliper.
Why does my piston spin but not go down?
This happens when you are not applying enough linear pressure while turning. The internal thread is not catching. Push harder against the ratchet or rewind tool handle. If it spins freely with no resistance and no inward movement, the internal parking brake screw has likely separated from the piston. The caliper needs to be replaced.
Do I need to open the bleeder valve when compressing the piston?
Generally, no. Pushing the fluid back to the master cylinder is standard procedure. Only open the bleeder if you suspect the fluid in the caliper is contaminated with moisture and debris, and you do not want to push that crud into the ABS module. If you open it, you will need to bleed the system afterward.
How do I prevent my piston dust boot from tearing?
Make sure the boot is fully released from the piston groove before retracting. If it is stuck, it will stretch and snap. A tiny flathead screwdriver helps pop it loose. If the metal tool adapter contacts a dry boot, it will instantly rip it. A light spray of silicone lubricant on the boot folds helps them slide without friction.
Conclusion
Mastering how to use brake piston tool is a gateway skill that turns costly shop visits into a satisfying Sunday afternoon project. The secret lies entirely in the diagnosis: knowing instantly whether your caliper requires a simple push or a precise twist.
To avoid ruining your brake system, always match the adapter to the piston pattern, watch your reservoir fluid levels closely, and never force a piston that refuses to move smoothly. Slow, even pressure wins over brute force every time.
With the piston sitting flush and the new pads bedding in correctly, you can drive away with confidence, knowing your brakes are ready for the next hard stop ahead.