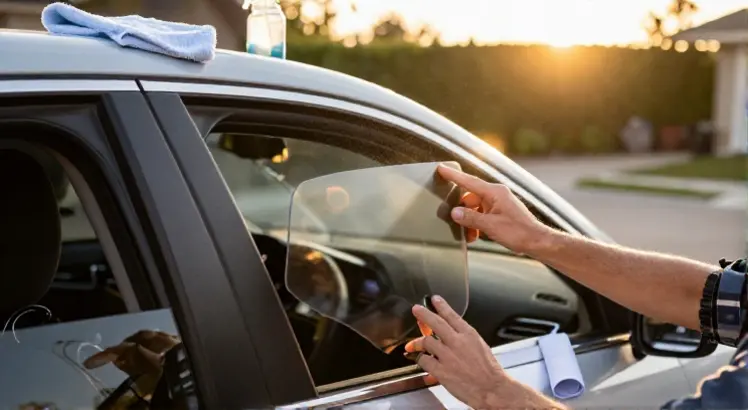
Installing side window deflectors is one of the simplest upgrades you can make to your vehicle. These slim pieces of plastic or acrylic, sometimes called rain guards or wind deflectors, let you crack your windows open even in bad weather without water dripping inside. If you want fresh air circulation while keeping rain, snow, and road noise at bay, learning how to install side window deflectors correctly is the first step.
Many vehicle owners hesitate because they worry about damaging paint or messing up window alignment. The truth is, with the right preparation and a careful process, the job takes less than an hour for all four doors. You do not need professional tools, just a clean workspace, some rubbing alcohol, and a little patience. This guide covers both stick-on and in-channel styles, so you can choose the method that fits your deflectors and your comfort level.
What Are Side Window Deflectors, and Why Install Them

WeatherTech Custom Fit Side Window Deflectors for Ford F-150, F-150 Lightning, F-150 Raptor – (801025IM-81765IM), Dark Tint
Check PriceSide window deflectors are precision-shaped shields that mount along the top edge of your side windows. Their main job is to redirect wind, rain, and snow away from the window opening. When you lower the glass a few inches, the deflector creates a barrier that prevents precipitation from entering the cabin, even at highway speeds. A comprehensive guide on Side Window Deflectors covers design differences in depth.
Beyond weather protection, these accessories reduce wind buffeting and interior fogging. On hot days, leaving windows slightly open under the deflectors keeps the cabin cooler without advertising that the car is unsecured. They also add a subtle, custom look that many drivers appreciate, and installing them yourself saves you money compared to paying a shop.
You will typically find two main mounting styles: tape-on (stick-on) deflectors that attach to the exterior door frame, and in-channel deflectors that slide into the window channel itself. Both types work well, but the installation steps differ. Before you start, you need to identify which style you have, because the approach will change.
Tools and Materials You Need

In-Channel Window Rain Guard for Chevy Trax 2024 2025 2026 Rain Guards Side Window Visors Low Profile Vent Visor Extra Durable Window Deflectors Vent Shades
Check PriceGathering everything beforehand makes the process smooth and prevents rushed mistakes. Most kits include the deflectors and alcohol prep pads, but having your own supplies ensures a cleaner bond.
- Side window deflectors (specific to your vehicle make and model)
- Isopropyl alcohol (70% or higher) and clean microfiber towels
- Adhesion promoter (if provided in the kit)
- Plastic trim panel tool (for in-channel deflectors)
- Masking tape or strips for holding deflectors during curing
- Heat gun or hair dryer (optional, for cold weather installation)
If you are working in temperatures below 60°F (15°C), warming up the adhesive tape with a hairdryer improves its stickiness. Do not skip the cleaning step, because even invisible wax or silicone residue will cause the deflectors to peel off later.
How to Install Tape-On Side Window Deflectors

Voron Glass in-Channel Extra Durable Rain Guards for Chevrolet (Chevy) Silverado/GMC Sierra 2500HD/3500HD 2020-2026 Crew Cab, Window Deflectors, Vent Window Visors, 4 Pieces – 200298
Check PriceTape-on deflectors use 3M automotive-grade adhesive strips already attached to the back of the deflector. This method is popular because it does not interfere with the window glass or the internal channel. However, the bond depends entirely on surface preparation.
Step 1: Clean the Door Frame Thoroughly
Start by washing the entire vehicle, but pay extra attention to the door frames where the deflectors will sit. After washing, wipe the mounting area with a microfiber cloth soaked in isopropyl alcohol. Rub firmly until no dirt or grease transfers to the cloth. Avoid household glass cleaners that contain ammonia or wax additives, as they leave a film.
If your kit includes an adhesion promoter, apply it now. This liquid primer creates a tacky surface that bonds extremely well with the tape. Apply it only to the area that the deflector will cover, and wait for it to dry according to the instructions, usually 30 to 90 seconds.
Step 2: Test Fit the Deflector
Before peeling any tape backing, hold the deflector in position on the door frame. Check for alignment with the window trim, the door edge, and the B-pillar. Many deflectors are labeled for front left, front right, rear left, and rear right, so make sure you have the correct piece. When you test fit, mentally note how the contour follows the door shape without gaps.
If a deflector does not sit flush, do not force it. Slight adjustments are possible, but a poor fit usually means you have the wrong side or the wrong vehicle application. Contact the manufacturer before proceeding to avoid wasting the adhesive.
Step 3: Warm the Tape and Peel Partially
If you are working in cool weather, gently warm the adhesive strips with a hairdryer for about 20 seconds. Do not overheat, as this can soften the deflector itself. Peel back only an inch or two of the red backing tape at each end, folding it outward so you can grip it later. This partial exposure lets you position the deflector without the full adhesive grabbing prematurely.
Step 4: Position and Press Firmly
Align the deflector exactly where you test-fitted it. Once you are confident, press the exposed adhesive areas against the door frame to anchor the deflector. Then gradually pull out the remaining backing tape from the center while pressing the deflector into place. Work slowly from one end to the other, applying firm, even pressure with your hand.
After the deflector is fully attached, run your thumb along the entire length twice, using heavy pressure. This ensures the adhesive flows into the microscopic pores of the paint. Some kits may include small clips or end caps, snap those on now if needed.
Step 5: Secure and Allow to Cure
Use strips of masking tape to hold the deflector in place, especially at the ends where tension might lift it. Avoid closing the door on the fresh install, and leave the windows up for at least 24 hours. Full adhesive cure typically takes 72 hours, during which you should avoid automatic car washes and high-pressure water.
How to Install In-Channel Side Window Deflectors

Side Car Window Visors Window Shade Vent Deflectors for 99-06 Chevrolet Silverado & GMC Sierra 1500 2500 3500 2500HD Rain Guards, 07 Silverado & Sierra 1500 3500 2500HD, with Extended Cab 94044 4-pc
Check PriceIn-channel deflectors fit inside the window glass run channel, the rubber groove that guides the window up and down. They do not use exterior adhesive, so they look cleaner and are favored by many enthusiasts. However, they require more care during installation to prevent window binding or damage to the auto-reverse safety feature.
Step 1: Clean the Window Channel
Lower the window completely and inspect the rubber channel. Spray a microfiber towel with alcohol, wrap it around a plastic trim tool, and run it through the channel to remove dirt, grit, and old lubrication. Dry the channel completely, because moisture can prevent the deflector from seating properly.
Step 2: Identify the Correct Orientation
In-channel deflectors are marked for specific doors and left or right sides. Notice that the deflector has a small tab or wing that fits into the vertical part of the channel. The curvature must match the window frame. Hold the deflector near the channel without inserting it to confirm it follows the curve naturally.
Step 3: Insert the Deflector Carefully
Start by inserting the front edge of the deflector into the channel near the mirror. Then flex the deflector slightly to tuck the rear edge into the channel near the B-pillar. Do not use excessive force. If the deflector has a small metal or plastic clip, push it up into the channel until it clicks. Work the deflector upward until it is fully seated and the top edge follows the roofline.
Some brands include a tiny bracket that fits between the rubber and the metal frame. Read the specific instructions for your kit, because skipping a supplied clip can lead to the deflector falling into the door.
Step 4: Roll the Window Up Gradually
Slowly raise the window. Expect resistance and perhaps a slight noise the first few times as the glass presses the deflector outward against the rubber channel. Do not force the window if it stops; lower it slightly, adjust the deflector, and try again. The window should close completely and the deflector will settle into a secure fit.
Step 5: Allow a Settling Period
Leave the windows closed for at least 12 to 24 hours. This allows the rubber channel to conform around the deflector and the window seals. After the settling period, operate each window several times to confirm smooth movement. If you hear scraping or binding, re-adjust the deflector before the rubber takes a permanent set.
If your vehicle has an auto-up safety feature that reverses the window, you may need to retrain it. Consult your owner’s manual for the calibration procedure, which often involves holding the window switch in the up position for a few seconds after it closes.
Common Mistakes and How to Avoid Them

Out-Channel Window Visors Rain Guards for 2021-2025 Nissan Rogue S SV SL,Side Window Deflectors Vent Visors,No-Drill Weather Protection,Car Accessories-4pcs
Check PriceOne frequent error is installing adhesive deflectors on a wet or cold surface. Without proper warmth and cleanliness, the tape bond weakens within days. Always install in a garage or shaded area when the temperature is between 65°F and 90°F. If you must work outside on a chilly day, use a hairdryer to warm the door frame as well as the tape.
Another mistake is rushing the cure time. Driving at highway speeds with freshly installed deflectors, even with masking tape, can lift the adhesive edges. It is best to let the vehicle sit overnight. Car washes, especially touchless high-pressure washes, should be avoided for at least 72 hours.
For in-channel installations, failing to clean the channel thoroughly leads to noisy operation and potential glass misalignment. Dirt trapped between the rubber and the deflector acts like sandpaper over time. Additionally, ignoring the initial window binding can burn out window regulators, an expensive fix that is easy to prevent with a little patience and adjustment.
Additional Accessories That Complement Your Upgrade
Once you master how to install side window deflectors, you might want to enhance other areas of your vehicle. Exterior upgrades like wheel spacers give your truck or SUV a wider, more aggressive stance and can improve handling. Our guide to the best wheel spacers for trucks and SUVs explains how to pick a safe, hub-centric set that matches your bolt pattern.
Inside the cabin, protecting your seats becomes easier with the right covers. After keeping rain out with deflectors, consider upgrading to durable, washable car seat covers that handle spills, mud, and pet hair without constant professional cleaning. Both mods improve comfort and preserve your vehicle’s value over time.
Frequently Asked Questions
Can I install side window deflectors by myself?
Absolutely. Both tape-on and in-channel styles are designed for DIY installation. As long as you follow the preparation steps and do not rush the curing period, one person can complete the job in under an hour. A second pair of hands helps with long-wheelbase vehicles, but it is not necessary.
Will deflectors cause wind noise?
High-quality, vehicle-specific deflectors actually reduce wind buffeting when the windows are slightly open. Poorly designed or universal-fit models can whistle at highway speeds. Stick to brands that custom-mold their deflectors to your vehicle’s window shape, and the noise will be minimal, often less than without deflectors.
How long do side window deflectors last?
With proper care, good deflectors last five years or more. In-channel models tend to stay put almost indefinitely because they are mechanically secured. Tape-on versions rely on adhesive that can degrade in extreme UV and temperature swings, but 3M tape typically holds for years if the surface was prepared correctly.
Can I remove the deflectors later?
Yes, removal is possible without damaging paint. For adhesive deflectors, use fishing line to gently saw through the tape, then remove residue with a rubber eraser wheel or adhesive remover. In-channel deflectors simply pull out, though the rubber channel may take some time to return to its original shape. Patience and a gentle touch prevent scratches.
Should I use a professional installer?
Most drivers do not need a professional. However, if you are uncomfortable with in-channel installation, especially on newer cars with sensitive glass position sensors, a reputable shop can install them quickly. A good resource is AutoZone’s detailed installation guide, which covers these steps and offers video support for tricky models.
Conclusion
Now that you know how to install side window deflectors, you can enjoy fresh air and quieter rides without ever worrying about a sudden rain shower. The key to a lasting installation is cleanliness, patience, and respecting the curing time. Whether you choose the easy stick-on route or the sleeker in-channel design, the result is a practical upgrade that makes daily driving more comfortable.
Take your time with the test fit, double-check each deflector’s placement, and let the adhesive or rubber channel settle before testing window operation. With these simple habits, your deflectors will stay secure for years and look as good as the day you put them on.