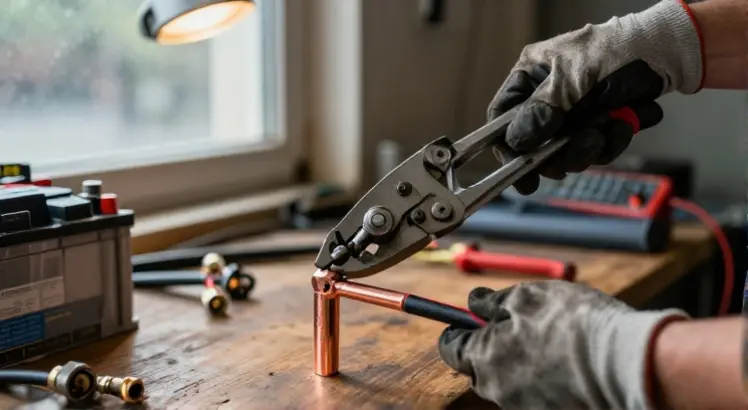
You twist the key, but instead of a roaring engine, you hear that dreaded rapid clicking sound or, worse, complete silence. Often, the culprit isn’t a dead battery. It is a corroded or poorly attached battery cable lug. Learning how to crimp battery cable lugs correctly is a fundamental skill that can save you from a roadside headache and prevent costly electrical damage. A loose connection creates resistance, which generates heat and can fry your starter or alternator.
This guide will walk you through creating professional-grade, durable connections. You might think you need a technician or an exotic machine, but with the right techniques, you can achieve a factory-quality bond right in your home garage. Whether you are building a custom winch setup, repairing a ground strap, or simply replacing a corroded factory terminal, clean power flow is the goal.
We will cover everything from picking the correct lug size to testing the finished connection. You will learn to differentiate a bad crimp from a great one. Let us stop chasing electrical gremlins and fix the foundation of your vehicle’s electrical system.
Why a Proper Crimp Matters for Electrical Safety

TKDMR 160Pcs Copper Wire Lugs AWG2 4 6 8 10 12 with Heat Shrink Set, 80Pcs Battery Cable Ends Ring Terminals Connectors Tubing Assortment Kit
Check PriceA battery cable carries massive amperage, sometimes over 300 amps during starting. Any restriction in the line, often at the lug, turns the connector into a miniature heater. According to Ohm’s Law, resistance creates heat. A bad crimp introduces air gaps between the wire strands and the lug barrel. Air gaps increase resistance because fewer copper strands actually contact the terminal wall.
This high-resistance connection becomes a bottleneck. Your engine will not crank efficiently, and the voltage drop might prevent sensitive electronics from functioning correctly. Over time, the heat cycles cause the copper to oxidize, making the connection worsen until it fails completely. A proper crimp creates a cold weld or at least a dense, air-tight mass that keeps oxidation out and conductivity high.
Simply hitting a lug with a hammer or squishing it in a bench vise is not enough. Those methods typically deform the lug unevenly, smashing the clamping area but failing to consolidate the copper strands inside. You end up with a mechanical hold that has little actual electrical integrity.
Essential Tools for Crimping Battery Cable Lugs

TKDMR 10 PCS 1/0 AWG – 3/8″ Battery Cable Lugs Copper Wire Ring Terminals | UL,Heat Shrink Cable Ends,Wiring Connector Terminal End,Electrical Crimp Connectors,Lug for 1/0 Gauge Wires
Check PriceYou cannot make a reliable connection with pliers and wishing. However, you do not need a $2,000 industrial bench press either. Understanding the different tiers of tools helps you pick what works for your budget and project scope.
The Hammer Crimper (Budget Tiers)
This is the most affordable entry point, and when used correctly, it works surprisingly well. The tool consists of a punch and an anvil. You place the lug on the anvil, insert the cable, and strike the punch with a heavy mallet or engineer’s hammer. The force upsets the copper and drives the punch deeper into the lug wall.
Make sure you choose a hammer crimper with interchangeable dies suitable for your cable gauge. A standard claw hammer is not suitable for striking these punches, as the face is too small and soft. You need a heavy, flat-faced hammer for clean, solid impacts without chipping the punch.
The Hydraulic Wire Crimper (Pro-Sumer Choice)
If you plan on doing this job more than once, a hydraulic crimper is a game-changer. These 6-ton to 16-ton kits come with multiple dies and look like a bottle jack with a crimping head. You pump the handle, and hydraulic pressure slowly compresses the die around the lug. It is nearly effortless and delivers consistent, hexagonal or square crimps that look highly professional.
The key is to use the correct die size. If the die is too large, it will not compress the copper. If it is too small, you will create flashing or sharp wings on the sides of the lug, which can cut heat shrink. These tools are surprisingly accessible, and you can find solid units for a reasonable price at automotive or marine supply stores.
Indent Crimpers vs. Compression
You might see handheld manual crimpers with long handles and an indent jaw. These are excellent for smaller gauge wiring up to 8 AWG or 6 AWG. For large 2 AWG or 0 AWG battery cables, they often do not provide enough mechanical leverage for a full, deep crimp. For heavy-duty battery cables, stick to hammer or hydraulic methods that provide a full 360-degree compression or a very deep indent.
Selecting the Right Lugs and Cable

264 PCS AWG 8-2/0 Copper Battery Cable Ends & Heat Shrink Tubing | 120Pcs Heavy Duty Ring Terminals, 144Pcs 3:1 Shrink Tubing, AWG 8 6 4 2 1/0 2/0 Awg, Auto Marine Wire Connectors
Check PriceBefore you make the first crimp, you must stop and verify your materials. A mismatch between the wire gauge and the lug is the most common cause of crimping failure. You cannot crimp a 4 AWG cable into an 8 AWG lug, even if you stuff it in there. The lug barrel must be sized precisely for the conductor.
- Copper vs. Copper-Tinned: Use tinned copper lugs for marine or under-hood applications where moisture is present. Pure copper is excellent for dry interior locations.
- Stud Size: The flat pad of the lug has a hole. Measure your starter post or battery terminal bolt. A standard automotive battery terminal usually uses a 3/8″ or 5/16″ hole.
- Seamless Barrels: Ensure the barrel is seamless. A seam in the copper tube can split open under high-pressure crimping forces.
When choosing cable, always go with stranded copper. Solid core wire has zero vibration tolerance and will snap near the crimp point. The finer the strands, the more flexible the wire. Welding cable, for example, features ultra-fine strands, which makes it excellent for routing in tight engine bays and provides superior current conductivity, but it requires a crimp style that does not crush the delicate strands.
How to Crimp Battery Cable Lugs: The Step-by-Step Process

1/0 AWG/Gauge – 3/8″ Battery Cable Lug Copper Connector Wire Ring Terminal | AIRIC,UL,1/0 AWG 3/8″,10Pcs,Heat Shrink Cable End,Electrical Wiring Crimp Connectors,Copper Battery Lugs,Wire Ring Terminals
Check PriceStep 1: Measure and Strip the Insulation
The strip length is the make-or-break moment of the job. Slide the bare lug against the cable jacket. You want to strip enough insulation so the bare copper wire fills the barrel completely but leaves only a tiny space, roughly 1/16″ to 1/8″, between the insulation and the lug entry. You want a minimal shiner of bare copper showing.
Too much bare wire exposed leaves a spot for short circuits and corrosion. Too little means the insulation gets crimped inside the barrel. You do not want insulation inside the barrel, because it prevents copper-to-copper contact and the wire will eventually pull out. Use a sharp utility knife or, better yet, a quality wire stripping tool designed for large gauges to avoid nicking the conductor strands.
Step 2: Slide on the Heat Shrink
This step sounds obvious, but forgetting it is the ultimate rookie mistake. There is nothing worse than crafting a perfect mechanical bond and realizing your adhesive-lined heat shrink is still sitting on the workbench. Slide a length of heavy-duty, dual-wall heat shrink tubing over the cable. Push it far enough back that the heat from the crimping process will not prematurely shrink it.
Step 3: The Crimp Technique
Insert the stripped copper into the lug barrel. If using a hydraulic crimper, match the die set to your lug size. For a 2/0 AWG lug, you select the 2/0 die. You should look for a mark on the lug that indicates gauge compatibility. Center the lug between the dies, and make sure the die compresses the middle of the barrel, not the very edge.
Pump the hydraulic handle until the pressure relief valve pops, or reach the mechanical stop. Do not pump past the relief valve repeatedly, thinking you need to hit it twice. This can over-compress the copper, causing it to deform and thin out, which damages the structural integrity. One solid, full compression stroke is sufficient.
With a hammer crimper, position the lug in the nest. Insert the punch. One crisp, hard strike with a 3-4 pound hammer is better than ten light taps. Light tapping just hardens the surface of the copper without penetrating the inner strands. The goal is one massive impact to upset the entire mass instantaneously.
Step 4: The Pull Test
Immediately after the crimp, put some muscle into it. Grip the lug in one hand and the cable in the other, and pull. It should feel like a single immovable bar of copper. If there is any movement, sliding, or clicking, the connection is compromised. You must cut it off, discard the lug, and start over. Do not try to salvage a loose crimp with solder, because solder wicking creates a brittle weak point just behind the lug where the wire will eventually break.
Step 5: Sealing with Heat Shrink
Slide the adhesive-lined heat shrink over the barrel of the lug. Ensure it covers the transition between the lug and the wire insulation completely. Use a heat gun, not a lighter. A lighter produces soot and uneven, dangerous heat that can char the jacket and poorly activate the adhesive. Heat the tubing from the center outwards until you see a tiny ring of adhesive ooze out from both ends. This creates a waterproof, vibration-resistant seal.
Solder vs. Crimping: Why the Industry Standard Changed

Twidec/130PCS Copper Wire Lugs AWG 2 4 6 8 10 12 14 16 Gauge Battery Cable Ends,Ring Terminals Connectors,Copper Ring Terminals,Battery Terminals Connectors Kits with Heat Shrink N-067-130PCS
Check PriceMany hobbyists still assume soldering is the gold standard for electrical connections. In high-vibration environments like an engine bay, it is actually inferior to a proper crimp. A solder joint wicks up the wire strands, creating a rigid section just before the lug. Engine vibration concentrates all the stress at the point where the rigid solder ends and the flexible wire begins. This is a common failure point.
High-end OEMs like aviation and marine applications mandate crimping specifically because a well-executed crimp allows the strands to remain flexible right up to the barrel edge. The gas-tight bond prevents corrosion without creating a stress riser. Crimping is not just easier, it is mechanically superior for longevity.
Common Mistakes to Avoid When Crimping Lugs

150pcs Battery Cable Ends, Copper Wire Lugs Assortment Kit AWG 2 4 6 8 10 Gauge – 70Pcs Battery Cable Lugs Ring Wire Terminal Connectors and 80Pcs Heat Shrink Tubing Kit for Marine Electrical Supplies
Check Price- Using a Vise to Smash: A bench vise flattens the lug, creating a thin, weak connection that cracks. It does not center the compression force effectively.
- Wrong Gauge Lug: Using a 4 gauge lug on a 2 gauge wire by filling the gaps with random copper strands defeats the purpose of a homogeneous crimp.
- Orientation Bias: Always check the angle of the lug pad before crimping. A starter lug facing 180 degrees away from the bolt is a frustrating mistake to fix.
- Corrosion Ignorance: If the bare copper wire looks black or green, do not use it. The oxides on the wire surface prevent the cold weld from forming. You must start with fresh, shiny copper.
Frequently Asked Questions

PEASUG Copper Wire Lugs 130Pcs, AWG 2 4 6 8 10 12 Gauge Battery Cable Ends with 66Pcs Heat Shrink Tubing Set, 64Pcs Ring Terminals Connectors Assortment Kit for Marine, Automotive, Cables, Appliances
Check PriceCan I safely crimp battery lugs with a hammer?
Yes, a hammer crimper is an effective tool when used correctly. The key is a dedicated crimping punch and anvil set, combined with one heavy, solid strike. A regular carpenter’s hammer might not hit hard enough, so a small sledge or engineer’s hammer is recommended to upset the copper in a single blow rather than pecking at it.
Do I need dielectric grease inside the lug before crimping?
No, you should crimp dry, bare, shiny copper to dry, bare, shiny copper. Applying grease or anti-oxidant compound inside the barrel before crimping can cause hydraulic lock, preventing the lug from compressing fully. Apply protective coatings or grease only to the exterior connection point, around the stud hole, after the crimp is complete.
What size lug fits a typical car battery terminal?
Most standard top-post battery terminals use a 3/8″ stud size, though some side-post or specialty terminals may use 5/16″. Always measure the bolt or stud diameter with a caliper before ordering. Too large of a hole will cause misalignment and a poor contact patch against the terminal surface.
Why does my hydraulic crimper leave sharp wings on the lug?
The sharp, flat wings indicate you used a die that was slightly too small for the lug. A correct die compresses firmly but does not extrude material out of the sides so extremely that it forms sharp ears. If you encounter this, knock the sharp edges down gently with a file so they do not cut through your heat shrink.
Conclusion
Mastering how to crimp battery cable lugs transforms you from a parts replacer into a true electrical troubleshooter. The difference between a starter struggling to turn over and one snapping to life is often a solid, zero-resistance termination. A reliable vehicle is built on these fundamental connections, not just flashy upgrades.
Take your time selecting the best battery cable lug for your specific wire gauge, and do not hesitate to make a practice crimp or two. The investment in a best battery cable crimping tool pays for itself the first time you avoid a tow truck fee. Remember that a clean, tight, and sealed connection is a job done once, and done right, offering you years of dependable starts and trouble-free high-current flow.
For a deeper understanding of these critical components, you can explore the standards set by the American Society for Testing and Materials. When the battery voltage drops to zero and the tools go back in the box, you will feel the quiet satisfaction of knowing your wiring can handle whatever the road, or the trail, throws at it.