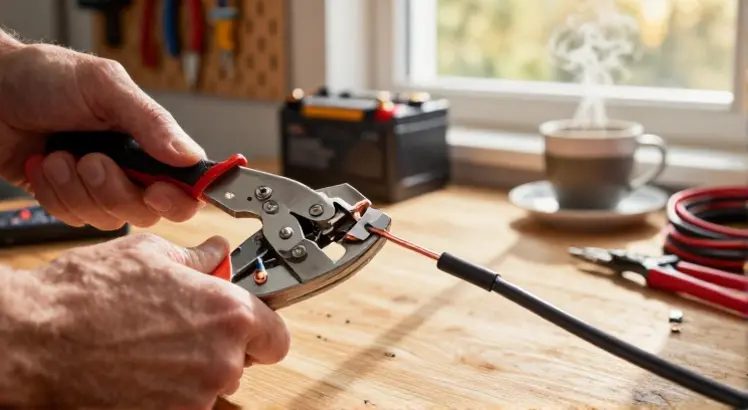
Picture this, you turn the key in your ignition, and instead of a roaring engine, you hear a pathetic click. Or maybe your headlights have the dim, flickering glow of a dying campfire. Frustration sets in, and you pop the hood, jiggling that corroded, frayed battery cable hoping for a miracle. We have all been there. The heart of your car’s electrical system relies on a solid connection, and that connection starts with a properly crimped battery cable.
Learning how to crimp a battery cable is not just a mechanic’s trick, it is a fundamental skill for any DIY enthusiast. A loose or poorly connected terminal creates resistance, which generates heat and robs your starter of the power it desperately needs. In this guide, I will walk you through the precise steps to create a reliable, professional-grade crimp. It does not matter if you are replacing a corroded end or building a custom wiring harness, I have got you covered.
Why a Proper Crimp Matters More Than You Think

Solsop Battery Cable Crimper Tool with 62PCS Copper Wire Lugs
Check PriceBefore diving into the toolbox, it is crucial to understand why just smashing a terminal with a hammer is a terrible idea. A battery cable carries a massive amperage load, especially during ignition. If the wire is not perfectly bonded inside the terminal lug, you create electrical resistance.
High resistance leads to heat buildup, which accelerates corrosion inside the connector. Worse, voltage drop prevents your starter motor from spinning fast enough, leaving you stranded. A proper cold-weld crimp, on the other hand, creates a homogeneous, gas-tight connection that prevents oxidation and ensures maximum current flow. It is the difference between a reliable engine start and a future headache.
Essential Tools for Crimping Battery Cables

Brileine 10 Tons Hydraulic Crimping Tool with 9 Dies
Check PriceYou cannot achieve a factory-quality crimp with pliers alone. Specific tools make the job not just easier, but actually possible. Investing in the right equipment, or knowing how to use a loaner tool from a local auto parts store, is half the battle. Here is what you absolutely need to gather before you start.
The Crimping Tool: Your Primary Weapon
Forget standard electrical pliers, battery cables are too thick for those. You need a heavy-duty crimper designed for large gauge wires, typically 8 AWG to 4/0 AWG. There are two popular types of tools for this job. The first is a hammer-style crimper, which requires a solid whack to indent the terminal, and the second is a hydraulic crimper, which uses fluid pressure for effortless, consistent force.
- Hydraulic Crimpers: These provide the most consistent, hex-shaped crimp. They require less physical effort and deliver professional results every single time. They are often found in a set with multiple dies for different wire sizes.
- Hammer Crimpers: These are budget-friendly tools. You place the terminal in the tool, insert the wire, and strike the top of the tool with a heavy mallet until the indentation is deep enough. They work well, but require a stable surface and a strong arm.
Supporting Cast: Cutters and Strippers
Never use a hacksaw to cut heavy gauge cable, it leaves a messy, frayed edge that is impossible to fit into a lug. Instead, a heavy-duty cable cutter with a ratcheting mechanism makes a clean, square cut. After cutting, you must strip the insulation. A dedicated heavy-gauge wire stripper is ideal, but a sharp utility knife and a steady hand can work in a pinch. Just remember, scoring the copper strands is a cardinal sin, as it weakens the wire.
Before you start crimping, it is also smart to ensure your vehicle’s main power source is in top shape. If you are constantly fighting electrical issues, reading up on how to choose the right car battery might save you a lot of time.
Choosing the Right Battery Terminals and Lugs
The lug you choose must match both the wire gauge and the battery post. Most cars use top-post terminals, but side-post terminals are common in many GM vehicles. You will find copper lugs, which offer excellent conductivity, and tinned copper lugs, which resist corrosion much better. For under-hood use, always lean toward tinned copper or sealed lugs.
The lug also needs the correct wire gauge stamp, such as 4 AWG or 2/0. A common mistake beginners make is trying to stuff a thick cable into a lug meant for a smaller gauge, or vice versa. A loose fit, even after crimping, is a failure point. Using high-quality best battery cable lug options ensures the metal is thick enough to hold the crimp without cracking.
How to Crimp a Battery Cable: Step-by-Step Guide

iCrimp Battery Cable Lug Crimping Tool for AWG 8-1/0
Check PriceNow that the workbench is clear and your tools are ready, it is time to get hands-on. Precision matters here, rushing will only waste a perfectly good terminal lug. Follow these steps meticulously to get a connection that is as strong as a weld.
1. Measure and Cut the Cable Cleanly
Route the cable where it needs to go first, avoiding hot engine parts like exhaust manifolds or moving pulleys. Once the path is confirmed, mark your cut point with a piece of tape. Using your ratcheting cable cutter, chomp down in one fluid motion. You need a flat, perpendicular edge. A jagged cut means the wire strands are uneven, resulting in poor contact inside the lug.
2. Strip the Insulation Without Nicking
Slide the wire into the stripping slot of your heavy-gauge tool. The strip length should match the barrel depth of your terminal lug, plus roughly an eighth of an inch. This extra bit ensures the copper fills the lug completely and slightly protrudes out the front, confirming full insertion. Rotate the stripper or utility knife gently. Once the cut is made, pull the insulation off without twisting the exposed copper strands. A clean, straight bundle of copper is what you need.
3. Install the Adhesive Heat Shrink Tubing
This is the step we all forget at least once! Slide a piece of heavy-duty, adhesive-lined heat shrink over the cable before you attach the lug. The adhesive-lined tubing is critical here because it creates a waterproof seal. Push it far enough down the wire so the heat from the crimping process does not prematurely shrink it. This tubing will be your primary defense against battery acid and moisture creeping into the connection.
4. Prep the Terminal Lug and Insert the Wire
Ensure your terminal lug is clean and dry. If you are using a hydraulic crimper, select the correct die for your gauge. It is marked on the side of the die, for example, 50mm² or 2 AWG. Insert the stripped copper bundle into the barrel of the lug firmly. You should feel it bottom out. Look at the inspection hole in the lug if it has one, you must see copper wire visible there. No copper in the window means no connection.
5. Execute the Crimp Properly
This is where the mountain meets the metal. Place the lug squarely between the dies of your crimper. If using a hydraulic tool, pump the handle steadily. The dies will compress into a perfect hexagonal shape without any sharp edges. If using a hammer crimper, place the tool on a concrete floor and strike it with a 3-pound hammer until the indentation is fully seated. You should not be able to pull the wire free, even with a strong tug.
It is vital to use a tool that provides enough leverage. If you do not own one yet, researching the best battery cable crimping tool for your budget can make this step much easier than struggling with pliers.
6. Seal with Heat Shrink
Slide the heat shrink tubing up until it touches the shoulder of the terminal lug. You want it to cover the entire exposed copper area and the seam where the wire enters the lug. Use a heat gun rather than an open flame. A lighter leaves soot and can melt the insulation unevenly. Heat the tubing from the center outward until the adhesive oozes slightly from the edges. This creates that perfect, corrosion-proof barrier.
Professional Tips for a Bulletproof Connection

AMZCNC Hammer Lug Crimper Tool for AWG 8 to 4/0
Check PriceSo you have followed the basic steps and made a solid crimp. But the difference between a job that survives one winter and a job that survives a decade lies in the tiny details. These professional tricks will make sure your car starts on the coldest mornings. This kind of experience is why reliability is built, not bought.
Solder vs. Crimp: The Heated Debate
Many old-school mechanics insist on soldering the wire inside the lug after crimping. While solder adds an extra layer of mechanical bond and conductivity, it has a significant downside in a high-vibration environment. Solder wicks up the wire strands, making the cable stiff and brittle right where it exits the lug. Over time, engine vibration can cause a soldered joint to crack. A properly executed cold-weld crimp is actually superior for automotive use because it allows the wire to remain flexible.
The Pull Test and Visual Inspection
Once the lug is crimped, put it in a vise or hold the cable tightly and pull. You should not detect any movement. If the copper strands slide even half a millimeter, the crimp failed. Cut the lug off and start fresh with a new one. Also, look for any wings or sharp flashing left by the crimping dies. A sharp edge can puncture your heat shrink. File it down gently if needed, but do not compromise the structural integrity of the crimp.
Dielectric Grease: The Secret Shield
Before you slide the heat shrink into its final position, you can apply a small amount of dielectric grease to the exposed copper at the base of the lug. This grease does not conduct electricity, but it seals out moisture and oxygen. After the tubing is heated, the grease gets trapped inside, forming an anti-corrosion bubble that dramatically extends the life of the connection. It is a cheap insurance policy against the green corrosion that kills battery cables.
If your existing terminals are looking crusty, you might be tempted to just clean them. However, understanding how to crimp battery terminals correctly allows you to replace them entirely for a fresh start. Also, a resource like the instructional video on heavy gauge crimping can serve as a great visual benchmark to confirm your technique.
Choosing the Correct Gauge for Your Application

Growlush Hydraulic Cable Crimping Tool 12 AWG to 4/0 AWG
Check PriceStranded copper wire is categorized by AWG (American Wire Gauge). The smaller the number, the thicker the wire. Using too thin of a wire is a fire hazard, while too thick is just wasting money and adding unneeded weight. Here is a quick reference for common automotive applications related to battery wiring, based on cable length and amperage draw.
- 4 AWG: Ideal for standard car battery grounds and main power wires running less than 4 feet. Handles most V6 and small V8 starters efficiently.
- 2 AWG: A great upgrade for high-compression engines. It provides a buffer for heat and resistance in longer cable runs.
- 1/0 AWG (One-Aught): This is for diesel engines, large displacement V8s, or systems with high-output aftermarket alternators. It is also common for winch power cables.
- Length Matters: A cable that stretches from the trunk battery to the front starter requires a much thicker gauge than a cable that travels 12 inches from the battery to the firewall. Always increase the gauge one size if the run is longer than 10 feet.
Common Mistakes Beginners Make

YUZES Hydraulic Crimping Tool 10 Tons, 12 AWG to 2/0
Check PriceI have seen the same issues pop up time and time again in garages and driveways. Fortunately, these problems are extremely easy to avoid once you know what to look for. Knowing what not to do is just as important as knowing the correct technique.
Using the Wrong Crimp Die
Using a die that is one size too big is the most frequent cause of failure. The crimp looks finished, but it lacks the pressure needed to cold-weld the copper strands together. Always double-check the markings on the dies against the markings on the wire and lug. If the die leaves a noticeable gap between the compressed wings, it is the wrong size.
Leaving Copper Exposed
It might be tempting to leave a gap between the lug and the heat shrink because you ran out of tubing length. Do not do it. Any exposed copper will immediately begin to oxidize, forming a black or green patina. That oxidation quickly travels inside the lug, breaking down the integrity of the connection. Make sure your tubing covers the wire insulation for at least half an inch on the wire side.
Frequently Asked Questions

AMZCNC Hydraulic Crimping Tool and Cable Cutter Kit
Check PriceCan I crimp a battery cable with vise grips?
Technically you can in an emergency, but I do not recommend it for a long-term fix. Vise grips create a narrow, uneven bite that distorts the lug. This increases resistance significantly. It is a temporary fix at best, and you will likely need to redo the job very soon. A proper crimper distributes pressure 360 degrees around the barrel.
Is it better to crimp or solder battery terminals?
For a vehicle that vibrates constantly, a quality crimp is superior. The SAE and USCAR standards heavily favor crimping over soldering alone. The problem with solder is the stiffness it causes, vibration eventually fractures the joint where the solder stops. If you want the ultimate connection, a correctly crimped joint is the only way to go, though adding a tiny amount of solder to the tip just to seal the front face is acceptable.
What size heat shrink should I use for 2 AWG cable?
For a 2 AWG cable with a standard lug, half-inch heavy-walled adhesive heat shrink usually works well. However, you should measure the outside diameter of the lug shoulder and the cable insulation. The heat shrink needs to recover tightly over the insulation. A 3:1 shrink ratio is much better than a 2:1 ratio because it forms a tighter seal over the uneven cable.
How do I know if my battery cable crimp is bad?
Look for signs of excessive heat. After running the engine or a high-draw accessory, touch the crimped area. If it is hotter than the surrounding cable, the resistance is high. Visual clues include melted heat shrink, a greenish powder (corrosion) forming at the seam, or a flickering voltage reading when wiggling the cable. Any of these mean the crimp needs to be redone.
Conclusion
Mastering how to crimp a battery cable empowers you to solve one of the most annoying automotive electrical glitches yourself. It is not just about cutting wire and squeezing a handle, it is about understanding the physics of a gas-tight, low-resistance connection. By using the right hydraulic or hammer tool, protecting the joint with adhesive-lined heat shrink, and avoiding common pitfalls like nicking the copper, you guarantee reliable engine starts for years.
You are now equipped to handle this repair in your own garage with confidence. Always prioritize safety, double-check your wire gauge against the terminal size, and never rush the stripping process. The next time you turn that key and your engine fires instantly, you will feel the satisfaction of a job perfectly executed. Go ahead and build that reliable connection.