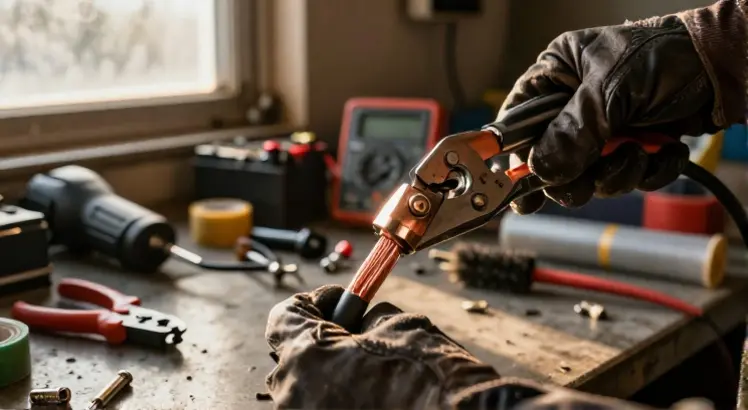
Nothing ruins a weekend project faster than a loose battery cable. You turn the key, and all you hear is a sad click. The culprit is often a poorly attached terminal. If you are looking to repair automotive, marine, or solar power cables, learning how to crimp battery terminals the right way saves you from voltage drops, overheating, and expensive electrical failures.
A solid mechanical bond is not just about squeezing metal together. It requires the correct tool, the right technique, and an understanding of your wire gauge. This guide walks you through every step, from stripping the insulation to making a professional cold-weld connection that lasts for years.
Why a Solid Crimp Matters for Your Vehicle

Solsop Battery Cable Crimper Tool with 62PCS Copper Wire Lugs
Check PriceA battery terminal connection handles high amperage. A thin, oxidized, or loose connection builds resistance. Resistance generates heat, and that heat can melt the battery post, damage the alternator, or even cause a fire. A proper crimp forms a gas-tight bond between the copper wire strands and the terminal lug.
Many beginners rely on a hammer or a pair of pliers. While that might get you home in an emergency, it leaves air pockets inside the lug. Corrosion creeps in, voltage drops, and starting issues appear on the coldest mornings. A proper crimp is a cold weld, fusing the strands into a solid mass without solder.
Essential Tools for Crimping Battery Terminals

Brileine 10 Tons Hydraulic Crimping Tool with 9 Dies
Check PriceYou cannot make a reliable connection without the right gear. The market is flooded with cheap tools that fold the terminal in half without compressing the wire. Investing in a purpose-built crimper makes the job safe and repeatable.
- Crimping Tool: A heavy-duty, long-handle, dimple-die or hex-die style. A high-quality battery cable crimping tool uses compound leverage to deliver tons of force.
- Wire Stripper: A sharp knife works in a pinch, but a dedicated cable stripper prevents nicking the copper strands.
- Battery Terminals or Lugs: Choose tinned copper or solid copper lugs that match your wire gauge. For top-post battery repairs, you might need replacement battery terminals with a ring-eye or clamp end.
- Heat Shrink Tubing: Dual-wall adhesive-lined tubing seals out moisture and acid fumes.
- Heat Gun: A lighter can burn the tubing, so a proper heat gun gives a clean finish.
- Wire Brush: For cleaning oxidation off the bare copper before crimping.
How to Crimp Battery Terminals: A Detailed Walkthrough

iCrimp Battery Cable Lug Crimping Tool for AWG 8-1/0
Check PriceStep 1: Select the Right Terminal and Lug Size
Matching the terminal to the wire gauge is the first critical step. Using a 4-gauge lug on a 2-gauge wire requires you to trim strands, which reduces current capacity. Conversely, stuffing a small wire into a huge lug results in a loose grip. Check the stamp on the lug barrel, it usually indicates the wire range in AWG (American Wire Gauge) or mm².
Most passenger car battery cables use 4, 2, or 1/0 gauge wire. Marine and high-end audio applications often go up to 2/0 or larger. Do not guess. Use a wire gauge tool or look at the printing on the jacket of the wire.
Step 2: Prepare the Cable with Precision
Strip away exactly enough insulation to fill the barrel of the lug, plus about 1/16 of an inch. You want a tiny bit of bare copper visible where the wire meets the barrel, so you can confirm the wire is fully seated. If you strip too much, exposed copper invites corrosion.
Twist the strands lightly to keep them tight, but do not over-twist. The strands need to flow freely when compressed. If the wire is oxidized or dirty, brush it vigorously with a wire brush until it gleams. Oxidation is the silent enemy of a low-resistance connection.
Step 3: Slip on the Heat Shrink Tubing First
This is the step everyone forgets until it is too late. Slide the heat shrink tubing over the cable and push it well away from the heat zone. Once you crimp the terminal on, there is no going back. Cut a piece long enough to cover the entire barrel and extend about a half-inch onto the wire insulation.
Step 4: Position the Terminal in the Crimper Dies
Open your crimping tool and select the die set that matches the terminal size. Most serious crimpers use color-coded dies or markings like 2 AWG, 4 AWG, etc. Place the terminal lug into the die, with the seam of the lug facing the indenter or the convex point of the die.
If you are using a dimple-style crimper, the pointed tooth must press into the solid face of the barrel, not into the seam. This ensures the compression forces the seam to close tightly rather than splitting apart.
Step 5: Fully Insert the Wire and Crimp
Push the bare copper into the lug until it stops, then hold pressure. Slowly close the crimper handles until the tool ratchets or bottoms out. Most hydraulic or compound tools make a sound when the cycle is complete. Do not stop halfway, that creates a partial crimp with uneven pressure.
For thick gauge wires like 1/0, you may need two crimps, one near the end of the barrel closest to the ring and one near the wire entry. Keep the crimps aligned so they do not overlap awkwardly. A double crimp increases mechanical pull-out strength significantly.
Step 6: Inspect Your Crimp Joint
Remove the cable from the tool and look closely. The copper should be slightly extruded from the end of the barrel, showing it is fully inserted. Give the wire a firm tug. There should be zero movement. If the terminal slides, the die was likely too large or the strands were trimmed excessively.
A high-quality crimp looks compact and uniform. The barrel diameter will be reduced and may have a slight hexagonal or dimpled shape. If you see cracks in the barrel, you used a die that was too small. Start over with a new lug, a cracked terminal is a fire hazard.
Step 7: Seal with Heat Shrink Tubing
Slide the heat shrink tubing down so it covers the entire crimped barrel and the transition onto the wire insulation. Use a heat gun on a medium setting and rotate the cable. Heat evenly until the adhesive oozes slightly out the ends. This creates a waterproof barrier against battery acid and road salt.
Let the tubing cool completely before bending the wire. Hot adhesive is soft and can be displaced. The finished connection should look clean and professional, with no copper exposed.
Crimping Without Specialized Tools (Emergency Fix Only)

AMZCNC Hammer Lug Crimper Tool for AWG 8 to 4/0
Check PriceIf you are stranded and need to get home, you can use a hammer and a punch. Place the lug on a solid steel surface, insert the wire, and strike the center of the barrel with a flat punch. This delivers a massive force over a small area, mimicking a dimple die. This method is crude, but it can work for a temporary repair.
Never use solder as your primary connection method. Solder wicks up the wire, creating a brittle spot that can crack under engine vibration. In high-amperage circuits, solder can soften and let go. A mechanical crimp is always superior, which is why aviation and marine standards require it.
Common Mistakes to Avoid When Crimping

Growlush Hydraulic Cable Crimping Tool 12 AWG to 4/0 AWG
Check Price- Using the Wrong Die Size: This either crushes the terminal or leaves it loose. Check the markings or use a sizing chart from the tool manufacturer.
- Crimping Over the Insulation: If the barrel grabs the plastic jacket, you have only a tiny amount of copper making contact. Resistance immediately spikes.
- Trimming Strands to Fit: Removing copper strands reduces the wire gauge right at the connection, creating a hot spot. Buy the correct lug instead.
- Neglecting Corrosion Protection: Even a perfect crimp can fail if you skip the adhesive heat shrink. Battery acid and moisture will wick into the copper and destroy it.
How to Test Your New Battery Terminal Connection

YUZES Hydraulic Crimping Tool 10 Tons, 12 AWG to 2/0
Check PriceA visual inspection is not enough. You need to perform a voltage drop test. Set your multimeter to DC voltage. Touch one probe to the brass or copper of the terminal lug, and the other probe to the battery post itself. Have a friend crank the engine or turn on the headlights.
You should see a reading of 0.1 volts or less. If the drop exceeds 0.2 volts, the connection has too much resistance. It might be loose, dirty, or poorly crimped. Fix it now before it leaves you stranded.
Many professional resources recommend this test for any high-current cable repair. For additional context on battery car replacement, you can explore How to Change a Car Battery.
Frequently Asked Questions

AMZCNC Hydraulic Crimping Tool and Cable Cutter Kit
Check PriceCan I crimp battery cables with pliers?
Standard pliers do not provide uniform pressure. They squeeze the sides, which often leaves the center of the strands loose. While you can use vise-grip pliers with a special jaw in a pinch, a dedicated dimple or hex crimper is the only way to guarantee a safe, low-resistance connection.
Is soldering battery terminals better than crimping?
No. In automotive environments, solder is brittle and prone to fatigue cracking from vibration. A proper crimp forms an elastic mechanical bond that resists vibration better. The joint is also more resistant to heat softening compared to tin-lead solder. High-reliability fields like aerospace and marine electronics mandate crimping over soldering.
How do I know if my crimp is tight enough?
Perform a pull test with firm hand pressure. The terminal should not move. You can also do a quick resistance check. A well-compressed crimp will have thousands of micro-connections between strands, and the barrel will look uniformly compressed without obvious gaps.
What size wire do I need for a battery cable?
Most passenger cars use 4 or 2 AWG for the main battery cables. High-compression engines or diesel trucks often require 1/0 or 2/0 AWG. Always check the owner’s manual or measure the existing cable. Undersizing the cable causes starting issues and potential melting.
Can I reuse an old battery terminal?
It is not recommended if the terminal is corroded or the clamping area shows deep scoring. The soft lead or tin plating wears out. Old terminals often have micro-cracks that invite resistance. New terminals are affordable and provide a fresh start.
Final Advice for a Professional Connection
Learning how to crimp battery terminals is a foundational skill for any DIY mechanic. It bridges the gap between a backyard repair and a factory-quality electrical system. Remember that the connection is only as strong as the tool you use. A properly chosen set of dies and a strong crimper turn a loose bundle of copper into one cohesive, conductive unit.
Take your time with the stripping and alignment. Protect the finished joint with adhesive heat shrink. Test your work under load. When you do it correctly, you will never have to worry about a no-start situation caused by a hot, corroded terminal again.
If you are building custom battery cables from scratch, invest in a reliable ratcheting crimper. It pays for itself the first time you avoid a tow truck call. Your vehicle’s entire electrical system depends on electrons flowing freely, and that flow starts right at the battery post.