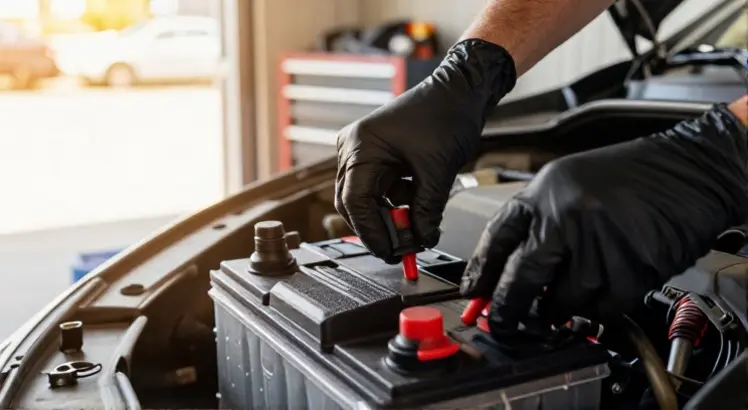
Installing battery terminal covers is one of the simplest maintenance tasks every car owner should know. Whether you have just cleaned your terminals or replaced an old battery, the right covers add a protective shield that keeps corrosion, moisture, and dirt away from the electrical connections. Learning how to install battery terminal covers takes only a few minutes, and the job requires no advanced mechanical skill.
Without covers, exposed terminals can develop the white or bluish fuzz that leads to poor electrical contact and hard starting. Putting on a quality cover is a quick way to extend the life of your battery and keep the entire starting system reliable. In this guide, I will walk you through the tools, safety steps, and three popular types of covers so you can finish the job with confidence.
Why Install Battery Terminal Covers?
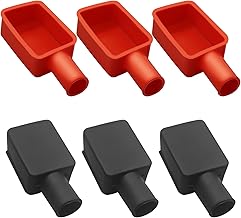
6Pcs Battery Terminal Cover, Battery Terminal Protector, Car Insulating Battery Cover, Soft Rubber Positive and Negative Poles Stud Covers Connector Top Post Cap for Car Motorcycle Truck (Red/Black)
Check PriceTerminal covers do much more than just make the battery look tidy. They act as a barrier between the metal posts and the outside world. Moisture in the air, road salt, and even stray drops of engine oil can settle on bare terminals and start the corrosion reaction. Once corrosion builds up, you may deal with voltage drops, slow cranking, and eventual no-start situations.
Beyond corrosion, uncovered terminals present a safety risk. If a metal tool or piece of jewelry accidentally bridges the positive and negative posts, you could see a dead short, sparks, or even a battery explosion in extreme cases. Why battery terminal covers matter becomes obvious once you understand these everyday risks. A simple cover, often made of rubber or plastic, adds measurable protection for both your vehicle and yourself.
Tools and Preparation
You do not need a toolbox full of specialty equipment for this task. Gather a few basic items before you pop the hood. Having everything ready makes the installation clean and frustration-free.
- Clean rag or microfiber towel
- Baking soda and water solution or a commercial battery cleaner spray
- Small wire brush (brass or stainless steel)
- Protective gloves and safety glasses
- New terminal covers specific to your battery size
Before starting any work near the battery, take a moment to think about safety. Remove metal jewelry like rings and watches, and keep loose sleeves away from the battery area. Even a minor spark near hydrogen gas can be dangerous, so make sure the engine is off and the key is out of the ignition.
If the terminals show heavy corrosion, clean them thoroughly first. A paste made from baking soda and water will neutralize the acidic buildup. Apply it with your wire brush, wipe away the residue with a rag, and let the terminals dry completely. Covers installed over dirty or corroded posts trap the problem and accelerate damage, so never skip this step.
Step-by-Step Installation Guide

Fastronix Red and Black Top Post Style Flexible Battery Terminal Cover
Check PriceTerminal covers come in a few different styles. The most common types are snap-on caps, bolt-on rings, and rubber boots that completely encase the cable lug. The general process remains similar across all three, and I will break down each method so you can match the steps to the covers you bought.
If you are still shopping for the right set, choosing the right terminal cover can save you time and guesswork. Look for materials rated for automotive temperatures, typically plastic blends that resist cracking or soft rubber that stays flexible in cold weather.
Installing Snap-On Terminal Covers
Snap-on covers are the most common type that come with new batteries or are sold as inexpensive add-ons. They are typically made of flexible red or black plastic and simply snap over the post and cable connection once everything is tightened.
Start by reattaching the battery cables properly if they were disconnected. Always connect the positive terminal first, then the negative. Tighten the nut or bolt until the connection is snug but not overtightened, as too much force can deform the soft lead post.
Take your positive terminal cover and align the open side with the post. Push the cover down firmly until you hear or feel it click into place. The lip of the cover should sit flush against the battery case, fully enclosing the metal parts. Repeat the same process on the negative side, using the black cover. Give each cover a gentle tug to confirm it will not pop off during normal driving vibrations.
Installing Bolt-On or Ring-Style Covers
Some aftermarket covers use a small bolt or a ring clamp to secure the cover around the terminal. These are popular for custom battery setups or when you want a more permanent seal. The extra hardware adds a layer of mechanical security that snap-on styles sometimes lack.
Begin by sliding the cover over the cable lug before you attach the cable to the battery. This step is easy to miss, and if you forget, you will have to remove the cable and start over. With the cover in position, bolt the cable to the terminal and tighten it to the manufacturer’s specification.
Next, position the cover so it fully surrounds the connection point. Use the supplied screw or ring clamp to fasten the cover to the terminal or the battery tray lip. Hand-tighten the fastener, then add a quarter turn with a screwdriver or nut driver. Avoid overtightening plastic parts, because cold plastic can crack under too much pressure. A secure but gentle fit is what you want.
Installing Rubber Terminal Boots
Rubber boots provide the most complete coverage because they wrap around the entire cable lug and post. You often see these on marine batteries or in vehicles that experience a lot of moisture. The flexible rubber creates a near watertight seal that holds up well in harsh conditions.
Installation is just as simple as the other styles, but pay attention to orientation. Slide the boot over the battery cable before you connect it to the post. Attach the cable and tighten the terminal bolt securely. Then pull the boot down over the connection. A small amount of dielectric grease applied inside the boot helps it slide on and adds another layer of corrosion protection.
Make sure the boot does not block the battery vent, if your battery has one. The boot should hug the terminal snugly, and you can adjust it slightly by twisting it into place. Unlike hard plastic covers, rubber boots will not crack when nudged, and they stay pliable through temperature swings. After installation, check that the boot does not interfere with the hood when it closes.
Tips for a Proper Installation

Ampper Top Post Flexible Military Spec Battery Terminal Cover, Battery Terminal Clamp Insulator Protector W/Washers for Car, Vehicle, RV and Boat (1 Pair)
Check PriceTaking a few extra seconds during the job can prevent future headaches. Always verify that the terminal clamp itself is in good shape. A loose or cracked terminal clamp will not hold the cable properly, and even the best cover cannot compensate for a poor electrical connection. Replace worn clamps before installing the covers.
Applying a thin coat of petroleum jelly or dielectric grease to the post and cable lug after cleaning adds an invisible shield against oxidation. Let the grease fill any microscopic pits on the metal surface, then wipe off the excess. This trick works together with the cover to nearly eliminate corrosion, and it is often used by professional mechanics in coastal or high-humidity areas. For additional corrosion prevention advice, this battery terminal corrosion prevention guide offers detailed methods that pair perfectly with your new covers.
After the installation, start the engine and let it run for a moment. Watch for any unusual flickering of lights or warning indicators on the dashboard. If everything looks normal, the cover has not disturbed the connection, and you are all set. Check the covers again after a week of driving to make sure they remain seated firmly.
Frequently Asked Questions

6PCS Battery Terminal Cover, Soft Rubber Insulating Battery Terminal Protector, Positive Negative Cable Lug Caps, Flexible Top Post Boots for Car Truck Motorcycle Boat Accessories (Red/Black)
Check PriceDo I need to disconnect the battery to install terminal covers?
In most cases you do not have to disconnect the cables to install snap-on push-on covers, especially if the covers are simple caps that press over the terminal after the cable is attached. However, for bolt-on ring-style covers or rubber boots that slide over the cable, you usually must remove the cable, slide the cover on, and reconnect. If you decide to remove the cable, always disconnect the negative terminal first and reconnect it last to avoid short circuits.
Can terminal covers completely stop corrosion?
Terminal covers dramatically slow down corrosion by blocking moisture and airborne contaminants, but they are not a 100 percent cure. Batteries naturally vent small amounts of acid vapor over time, and some corrosion can still form under the covers if the terminals were not cleaned properly beforehand. Combining covers with regular cleaning and a dab of dielectric grease gives you the best long-term protection.
How often should I replace my battery terminal covers?
Quality terminal covers can last as long as the battery itself. Inspect them every time you check the oil or tire pressure. If you notice cracks, brittleness, or a loose fit that allows any metal to peek through, it is time for a fresh set. Covers are inexpensive, so replacing them at the first sign of wear is smarter than risking electrical issues down the road.
Conclusion
Learning how to install battery terminal covers is a small skill that pays off in reliability and safety. Whether you choose simple snap-on caps, secure bolt-on rings, or full rubber boots, the process boils down to cleaning, proper positioning, and a careful finish. With clean terminals and a snug cover, you have taken a straightforward step toward maintaining a healthy electrical system.
Take ten minutes this weekend to inspect your battery. If you see bare posts, pick up a set of covers and install them using the steps above. The protection they add against corrosion and accidental shorts is well worth the tiny investment of time and money. Your car will thank you with reliable starts season after season.