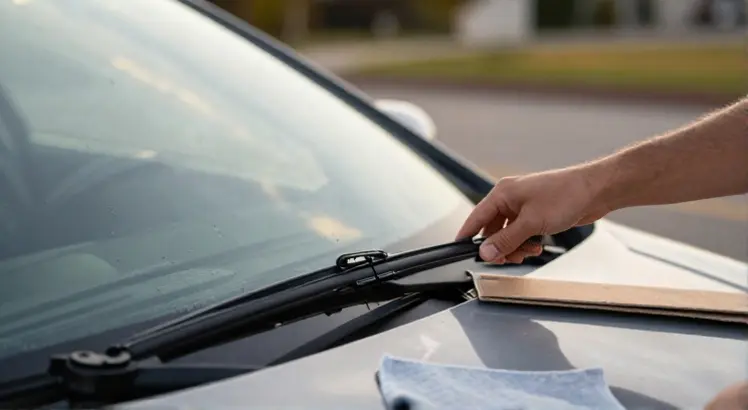
Have you ever struggled to see through a streaky windshield during a rainstorm? Worn-out wiper blades are not just annoying, they are a genuine safety risk. Learning how to change windshield wiper blades is a basic car maintenance skill every driver should master. The good news is, you do not need a mechanic or fancy tools to do this job. In fact, you can swap out both blades in about 10 minutes, even if you have never worked on a car before.
Neglecting your wipers can lead to reduced visibility, scratched glass, and expensive windshield repairs down the road. This guide walks you through everything you need to know. We cover when to replace your blades, how to pick the right ones, and detailed steps to install them without damaging your wiper arms. By the end, you will feel confident tackling this simple DIY project in your own driveway.
Why You Should Replace Wiper Blades Regularly

BOSCH 22A22B ICON Beam Wiper Blades – Set of 2 Blades (22A & 22B)
Check PriceClear visibility is the most obvious reason to keep fresh wipers on your car. Good blades sweep away rain, snow, mud, and dust in a single, quiet pass. When they start to harden and crack, they leave behind streaks, smears, or noisy chatter that forces you to squint through the glass. That split second of impaired vision is all it takes for a dangerous situation to develop.
Beyond safety, old wiper blades can damage your windshield. A metal frame that has bent out of shape, or a rubber squeegee that has lost its edge, can drag microscopic grit across the glass. Over time, this creates fine scratches that catch glare and weaken the structural integrity of the windshield. Replacing wipers proactively protects both your sightline and your investment in the car.
How Often Should You Change Your Windshield Wipers?

PEAK Snow Beast Winter Windshield Wiper Blade, 22-inch
Check PriceMost manufacturers recommend changing wiper blades every six to twelve months. However, climate plays a huge role. Intense sun, extreme cold, and frequent use will degrade the rubber faster. If you live in a region with harsh winters or scorching summers, you might need to replace them twice a year.
Watch for the warning signs rather than relying strictly on the calendar. If your wipers leave streaks, skip across the glass, squeak, or split at the edges, it is time for a new set. Also, run your finger along the rubber edge, if it feels hard, chipped, or uneven, the blade has lost its flexibility and can no longer conform to the windshield curvature properly.
Choose the Right Replacement Blades

AUTOBOO 26″ and 16″ Windshield Wipers Blades (Pack Of 2)
Check PriceNot all wiper blades fit every vehicle. You need the correct length, attachment type, and sometimes a specific adapter. Check your owner’s manual or use an online fitment tool to find the driver-side and passenger-side sizes. Many cars require two different lengths, and the rear wiper often uses an entirely unique blade.
When shopping, you will see conventional bracket blades, beam blades, and hybrid designs. Conventional blades are budget-friendly and work well on older cars with flatter windshields. Beam blades perform better on curved glass and in winter because they prevent ice buildup. If you need help narrowing down your options, explore our guide to the best windshield wiper blades for detailed comparisons and recommendations.
If you frequently drive through snow, slush, or freezing rain, consider a winter-specific blade. These use a rugged rubber cover to keep the frame from clogging. Top-rated winter wiper blades can make a noticeable difference when temperatures drop and visibility becomes critical.
Tools You Need for Wiper Blade Replacement

5 PLUS® Silicone Wiper Blades 22 inch (2 Pack)
Check PriceThe beauty of this job is that it requires practically no tools. Most modern wiper blades use a simple clip or tab system that you can operate with your fingers alone. You might want a soft, clean microfiber towel to protect your windshield and a small flathead screwdriver just in case a stubborn clip refuses to budge, but that is the extent of it.
Before you begin, make sure the car is parked on a level surface with the ignition off. Lay the towel on the windshield directly below the wiper arm. This way, if the arm accidentally snaps down, the towel cushions the blow and prevents the metal arm from cracking the glass.
How to Change Windshield Wipers: Step-by-Step Instructions

MOTIUM All-Season Windshield Wiper Blades 22″+22″ (Set of 2)
Check PriceStep 1: Lift the Wiper Arm Safely
Gently pull the wiper arm away from the windshield until it locks into a vertical service position. Many cars allow the arm to stand up on its own, but some require you to hold it in place. Never force the arm past its natural stopping point. If the arm feels resistant, check for a service mode position by turning the ignition on and off briefly with the wiper stalk, then lifting the arm.
Keep a firm grip on the arm. If it slips out of your hand and smacks the bare windshield, the impact can chip or crack the glass. The microfiber towel you placed earlier acts as insurance, but maintaining control is still the best policy.
Step 2: Identify the Attachment Type
Wiper blades attach to the arm in several common ways. Knowing which type you have makes removal and installation smooth. The most common designs include:
- Hook arm connector: A J-shaped metal hook at the end of the arm slides into a plastic socket on the blade.
- Pinch tab connector: Two small tabs on the sides of the adapter must be pinched inward to release the blade.
- Bayonet connector: The blade plugs straight onto a flat, narrow arm end, often with a locking clip.
- Side pin or button connector: Common on rear wipers, a small pin or button is pressed while sliding the blade off.
Examine your existing blade and consult the instructions that came with your new set. Many replacement blades include multiple adapters so they fit various arm styles. Select the correct adapter before you head to the car to save time.
Step 3: Remove the Old Wiper Blade
With the arm standing upright, look at where the blade meets the metal arm. On a hook-style connector, you will usually see a small release tab or latch. Press or slide this tab while pushing the blade down toward the windshield. The blade should slide off the hook smoothly.
For pinch tab connectors, squeeze the two side tabs together and pull the blade away from the arm. Bayonet types typically require you to press a locking clip and slide the blade off in one direction. Take a moment to note exactly how the old blade sits, that orientation will help you line up the new one correctly.
If the blade feels stuck, do not yank or twist. A sticky attachment can often be freed by gently wiggling the blade side to side while holding the arm steady. Using the flathead screwdriver to gently pry a stubborn plastic clip is safe, just avoid touching the metal arm with excessive force.
Step 4: Attach the New Blade and Secure
Unpack your new wiper blade and verify the adapter matches the one you just removed. Align the open end of the connector with the arm’s hook or pin. Slide the blade on until you hear a firm click. The click tells you the locking mechanism has engaged properly.
Give the blade a gentle tug toward the base of the arm to confirm it is locked in place. A loose blade can detach mid-swipe, leaving metal on glass, which causes instant damage. Double-check that no plastic tabs are bending outward or showing stress marks. If anything looks off, remove and reseat the blade.
For beam blades or hybrid designs, make sure the curvature follows the windshield shape. Some brands mark the blade with a specific orientation, such as driver side or a directional arrow. Align it accordingly so the aerodynamic spoiler faces the correct way.
Step 5: Gently Lower the Arm and Test
Carefully lower the wiper arm back to the glass, making sure the new blade sits flush against the windshield. Do not let it snap down. Once both sides are replaced, sit in the driver’s seat and spray washer fluid. Run the wipers through several complete cycles and listen for any unusual noises.
A properly installed blade will glide silently and leave a uniform, streak-free film of fluid. If you see streaks, the blade may have been installed crooked or the glass needs cleaning. Small adjustments, like reseating the blade or wiping off protective shipping wax, usually fix minor issues immediately.
Common Mistakes to Avoid When Replacing Wiper Blades
- Letting the arm hit the windshield: Even with a towel, a high-speed snap can crack glass. Always maintain control of the arm.
- Forcing the wrong adapter: If the new blade does not click easily, you likely have the wrong adapter installed. Forcing it can break plastic clips and leave you stranded in bad weather.
- Ignoring the rear wiper: Many SUVs and hatchbacks have a rear wiper that wears out just as fast as the front ones. Replace it at the same time.
- Skipping windshield cleaning: Old wax, road grime, and tree sap cause even new blades to chatter. Clean the glass thoroughly with a dedicated glass cleaner before testing.
- Installing blades backward: Some aerodynamic spoilers must face a certain way to press the blade against the glass at speed. Check packaging for orientation.
A few minutes of patience prevent frustration. If you get stuck, refer to the blade manufacturer’s written instructions rather than forcing anything. Many auto parts stores also offer free demonstration videos or in-store help. For a visual walkthrough, AutoZone’s step-by-step instructions are an excellent resource.
Frequently Asked Questions
Can I change wiper blades in the rain or cold?
Yes, you can. Rain makes the rubber pliable, so installation is often easier. In freezing temperatures, warm the new blades indoors for a few minutes to make the rubber more flexible. Work quickly and wear gloves to avoid numb fingers.
Do I need to replace both wiper blades at the same time?
It is strongly recommended. Both blades have been exposed to the same conditions and will wear at similar rates. Replacing only one leads to uneven cleaning and reduced visibility on half of your windshield. Always replace them in pairs for consistent performance.
How much should a wiper blade replacement cost?
A quality single blade costs between $10 and $30, while premium beam blades or winter-specific models may run $25 to $40 per blade. Doing the job yourself saves the labor fee a shop would charge, typically $10 to $20 per blade. A full DIY set can be installed for under $50 in most cases.
What if my new wipers still streak?
First, clean the windshield with a dedicated glass cleaner and a microfiber cloth. Often, invisible road film causes skipping. Check that the blade is properly seated and the correct adapter is used. If streaking continues after a few days, the blade may have a manufacturing defect, and you should return it for a replacement.
Can I just replace the rubber refill instead of the whole blade?
Some traditional frame-style blades allow refill replacements, but most modern beam blades are designed to be replaced as a complete unit. Refills are cheaper but can be tricky to install perfectly. For the average driver, swapping the entire blade is faster, more reliable, and eliminates the guesswork.
Conclusion
Now you know exactly how to change windshield wiper blades without any stress. It is a quick, tool-free job that pays off every time you drive in wet weather. By recognizing worn blades early and choosing a quality replacement, you maintain crystal-clear visibility and protect your windshield from avoidable damage.
Bookmark this guide for your next wiper swap, and if you live in a snowy climate, consider upgrading to a set of dedicated winter blades. Taking ten minutes to replace your wipers is one of the most affordable and impactful ways to stay safe on the road. Once you have done it once, you will never pay a shop to do it again.