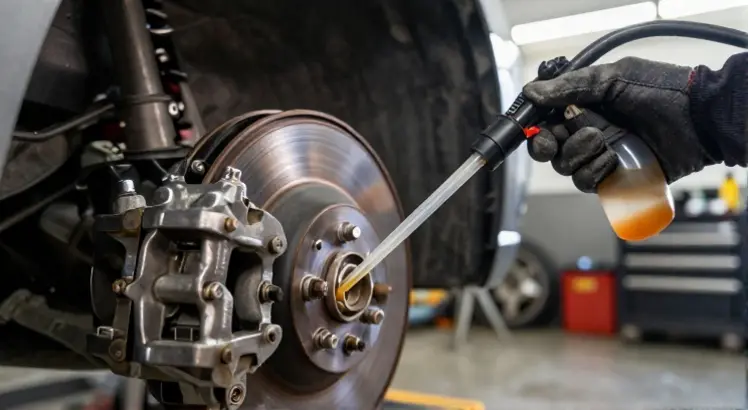
If you have ever pressed the brake pedal and felt a squishy, unresponsive mush instead of a firm stop, air trapped in the brake lines is likely the culprit. Bleeding the brakes removes those stubborn air bubbles and restores the crisp pedal feel that keeps you safe on the road. The Orion Motor Tech brake bleeder makes this a straightforward one-person job, no helper required. This guide walks you through how to use Orion Motor Tech brake bleeder, from unboxing to testing the pedal, so you can perform a professional-grade bleed in your own garage.
Whether you are dealing with a spongy pedal after a caliper replacement or simply performing routine maintenance, a vacuum bleeder saves time and frustration. While many Orion Motor Tech tools, such as the Orion Motor Tech brake caliper tool, handle the mechanical side of repairs, this bleeder tackles the hydraulic system. Follow along to understand exactly how the kit works, how to set it up without leaks, and the correct sequence to flush old fluid.
What Is the Orion Motor Tech Brake Bleeder?

Orion Motor Tech Brake Bleeder Kit with Hand Vacuum Pump and Adapters
Check PriceThe Orion Motor Tech brake bleeder is a hand-operated vacuum pump kit designed to extract old brake fluid and trapped air through the bleeder valve. It includes a sturdy pump body, a fluid collection bottle, multiple hose adapters, and a pressure gauge that helps you monitor vacuum levels. The kit works on most cars, trucks, and motorcycles, thanks to the universal rubber fittings that grab onto different bleeder valve sizes.
Unlike traditional two-person methods where someone pumps the brake pedal while another opens the valve, this vacuum bleeder allows you to work alone. You simply attach the adapter, pump the handle to create suction, crack the valve open, and watch the old fluid flow into the reservoir. The whole process is quiet, controlled, and eliminates the risk of pushing the master cylinder piston into an unfamiliar bore area.
This tool is a favorite among DIYers because it is budget-friendly, lightweight, and does not require an air compressor. The transparent tubing lets you see exactly when fresh fluid appears, so you know when to move to the next wheel. If you also use a brake caliper compression tool for pad swaps, the Orion bleeder is the natural next investment to complete the hydraulic service.
How a Vacuum Brake Bleeder Works

Orion Motor Tech Brake Bleeder Kit with Hand Pump
Check PriceAt its core, the Orion Motor Tech bleeder relies on negative pressure. When you pull the hand pump, you create a vacuum inside the fluid collection bottle and the attached line. That vacuum draws fluid and air bubbles out of the caliper or wheel cylinder, pulling them through the bleeder screw and into the reservoir. Because the system is sealed, no outside air sneaks back in.
It is important to understand that you are not pressurizing the master cylinder. Instead, you are pulling fluid from the low point, which naturally encourages fresh fluid from the reservoir to flow downward. This method mimics gravity bleeding but accelerates the process. You maintain total control, and you can stop the flow immediately by closing the valve.
The clear tubing plays a crucial role. You can watch for air bubbles, debris, and color changes as old amber fluid transitions to clean, new brake fluid. This visual cue is your signal that the line is fully purged. Once the stream runs bubble-free and clear, you know that portion of the system is properly bled.
Step-by-Step Guide to Using the Orion Motor Tech Brake Bleeder
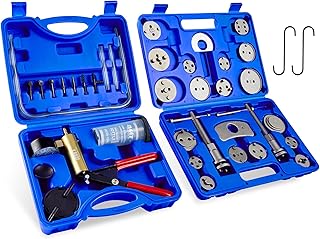
Orion Motor Tech 2-in-1 Brake Caliper Compression & Bleeder Kit
Check PriceWhat You Will Need
- Orion Motor Tech brake bleeder kit with collection bottle and adapters
- Fresh, manufacturer-recommended brake fluid (DOT 3, DOT 4, or DOT 5.1 as specified)
- A box-end wrench that fits your bleeder valves (usually 8mm, 10mm, or 11mm)
- Safety glasses and nitrile gloves
- Jack and jack stands or a sturdy set of wheel ramps
- Paper towels or shop rags for spills
- A turkey baster or syringe to remove old fluid from the master cylinder reservoir
Setting Up the Bleeder Kit
Start by assembling the fluid collection bottle. Screw the lid tightly onto the jar, then attach the two hoses to their respective ports. The hose that connects to the hand pump goes to the larger barb on the lid, while the smaller hose that goes to the bleeder valve attaches to the pickup tube inside the jar. Double-check these connections so you do not accidentally draw fluid into the pump mechanism.
Select the correct tapered rubber adapter from the kit. Slide it onto the end of the bleeder hose, ensuring a snug friction fit. The adapter should fit tightly over the bleeder screw nipple without splitting. For additional guidance on assembly, you can visit the manufacturer’s instruction to confirm part compatibility.
Test the vacuum before going near the car. Place your thumb over the adapter tip and pump the handle several times. The pressure gauge needle should climb toward the green zone, and the pump should become harder to squeeze. If you hear hissing or the needle drops, inspect the lid gasket, hoses, and the adapter seal. A leaky setup will give false results and waste fluid.
Preparing Your Vehicle
Park on a level surface, set the parking brake, and chock the rear wheels. Loosen the lug nuts on the wheel you plan to bleed first, then lift that corner with a jack and secure it on a jack stand. Remove the wheel to access the brake caliper and bleeder valve. Repeat this for all four corners if you intend to flush the entire system.
Pop the hood and locate the brake master cylinder reservoir. Use a turkey baster to suction out as much old, dark fluid as possible without exposing the ports at the bottom. Pour the old fluid into a sealed container for proper disposal. Wipe the reservoir rim clean, then fill it with fresh fluid to the MAX line. Cap the reservoir lightly to keep dust out, but do not lock it tight, you need to refill often.
Always refer to your owner’s manual for the correct brake bleeding sequence. Most vehicles require you to start at the wheel farthest from the master cylinder, typically the right rear, then move to the left rear, then the right front, and finish at the left front. Following this order pushes the longest line of old fluid out first.
Bleeding the Brakes One Wheel at a Time
Place your box-end wrench on the bleeder valve, but do not loosen it yet. Push the adapter firmly onto the bleeder screw nipple. Give the hand pump 10 to 15 steady squeezes until the pressure gauge shows strong vacuum. You want to build enough negative pressure so that as soon as you crack the valve open, fluid moves immediately.
While keeping one hand on the pump, use your other hand to turn the bleeder screw counterclockwise about a quarter to half a turn. You should see dark fluid and tiny air bubbles travel through the clear tubing. Keep pumping slowly and steadily. If the vacuum drops too fast, tighten the screw momentarily, build vacuum again, and reopen it.
Pump until the fluid runs clean and bubble-free, which can take 10 to 20 pump cycles per wheel. Watch the master cylinder reservoir like a hawk. Never let the fluid level drop below the MIN mark. If it does, you will suck air straight into the ABS module and master cylinder, forcing you to start over. Refill the reservoir after every 2 to 3 pump-and-hold cycles.
When the stream looks perfect, tighten the bleeder screw while maintaining a light vacuum. Then remove the adapter. Snug the screw firmly but avoid overtightening, bleeder valves can snap with too much force. Wipe any spilled fluid off the caliper immediately, brake fluid destroys paint.
Checking and Topping Off Brake Fluid
Once you finish the final wheel, top off the master cylinder reservoir to the FULL or MAX indicator. Secure the cap tightly and clean up any drips around the reservoir. Leave the cap slightly loose during the bleed but fully tighten it afterward. Confirm the rubber gasket on the cap is intact to prevent moisture absorption.
Dispose of the used fluid in the collection bottle responsibly. Most auto parts stores accept old brake fluid for recycling. Rinse the collection bottle and hoses with a small amount of fresh fluid to keep them clean for the next use. Store the pump with the handle released to preserve the internal seals.
Testing the Pedal Feel
Reinstall the wheels, torque the lug nuts to specification, and lower the vehicle. Before you start the engine, pump the brake pedal several times with medium pressure. The pedal should rise and harden steadily. If it still feels spongy, start the engine and test the pedal again with the brake booster active. A healthy system will offer firm resistance after a short take-up travel.
Perform a slow-speed test drive in a safe, open area. Apply the brakes gently at first, then progressively harder. Listen for any unusual noises and feel for pulsations. If the pedal remains solid and stops the car smoothly, you have successfully bled the brakes with your Orion Motor Tech bleeder.
Pro Tips for a Successful Brake Bleed
Orion Motor Tech Brake Bleeder Kit with Hand Vacuum Pump and Adapters
Check Price- Warm the brake fluid to room temperature before pouring. Cold fluid flows slower and can make the bleed feel sluggish.
- Apply a small dab of silicone grease around the bleeder screw threads before bleeding. This prevents false air bubbles from sneaking past the threads and entering the tubing.
- If you encounter a stubborn bleeder valve, spray it with penetrating fluid a day ahead. Forced attempts often round off the hex or snap the valve.
- Keep the collection bottle below the caliper level. This prevents fluid from flowing backward if the vacuum momentarily drops.
- Whenever you replace a caliper or brake hose, bench bleed the master cylinder first. An air-filled master cylinder cannot be corrected with a vacuum bleeder alone.
Common Mistakes to Avoid
One of the biggest mistakes is rushing the process. Many DIYers build vacuum, crack the valve, and expect all the air to vanish in three pumps. Give each wheel enough time to push a healthy volume of fresh fluid through the line. Patience yields a firm, reliable pedal.
Letting the master cylinder run dry is another frequent error. You are pulling fluid out faster than you might realize. Check the reservoir every 30 seconds, not every wheel. A dry reservoir introduces a massive air pocket that requires an ABS scan tool to bleed out on some vehicles.
Using old, unsealed brake fluid sabotages the entire job. Brake fluid is hygroscopic, meaning it absorbs moisture from the air. Always crack open a new, tightly sealed container. If your fluid has been sitting on a shelf for over a year, discard it and purchase fresh fluid that meets your car’s DOT specification.
Overtightening bleeder valves is a costly mistake. These small hollow bolts are not structurally strong. Torque them to the manufacturer’s specification, which is typically 5 to 10 foot-pounds. When in doubt, snug them gently and check for leaks after the test drive.
Orion Motor Tech Brake Bleeder vs. Pressure Bleeders
Orion Motor Tech Brake Bleeder Kit with Hand Pump
Check PricePressure bleeders work by forcing fluid from the master cylinder reservoir downward, while vacuum bleeders pull fluid from the caliper. Both achieve the same goal, but a vacuum bleeder like the Orion kit is simpler and cheaper. You do not need a specialized reservoir cap adapter for each vehicle model, and there is no risk of blowing out the master cylinder seals with excessive air pressure.
Pressure systems can be faster for a professional shop, especially on cars with complex ABS units. However, for home use, the Orion vacuum bleeder handles straightforward flush jobs beautifully. The only downside is that on some vehicles with tiny bleeder screws, you may see tiny bubbles forming around the threads, but a dab of grease solves that in seconds.
Consider a pressure bleeder if you bleed brakes on multiple vehicles every month. For the weekend warrior performing seasonal maintenance, the Orion Motor Tech brake bleeder delivers consistent results without the extra cost or bulk.
Frequently Asked Questions
Can one person really bleed brakes with the Orion Motor Tech bleeder?
Yes, that is the entire purpose of a vacuum bleeder. You attach the kit to the bleeder valve, pump the handle to create suction, and open the valve on your own. Just keep an eye on the master cylinder fluid level and refill often. It eliminates the old two-person communication dance entirely.
Do I need to bleed all four brakes?
If you only opened one line, say during a caliper replacement, you can often bleed just that corner successfully. However, brake fluid absorbs moisture over time, so it is best practice to flush the entire system at once. This gives you fresh fluid in every line and a consistent pedal.
What brake fluid works with this bleeder?
The Orion Motor Tech brake bleeder is compatible with DOT 3, DOT 4, and DOT 5.1 fluids. Do not use DOT 5 silicone-based fluid in systems designed for glycol-based fluids. The kit material handles all standard glycol fluids without degrading. Always match the fluid type to your vehicle’s cap label.
Why do I still have a soft pedal after bleeding?
A soft pedal after a bleed often comes from a tiny leak at the bleeder adapter that pulled air bubbles into the tubing during the process. Re-bleed the wheel with a fresh layer of grease on the threads. If the pedal remains low, inspect for a leaking brake line, a failing master cylinder, or improperly adjusted rear drum brakes.
Can I use this bleeder for a clutch hydraulic system?
Many vehicles with a hydraulic clutch share the same fluid type and bleeder valve design. The Orion kit can bleed a clutch slave cylinder just as easily as a brake caliper. Attach the adapter to the clutch bleeder valve and follow the same vacuum procedure, just make sure the clutch reservoir stays full.
Conclusion
Learning how to use the Orion Motor Tech brake bleeder transforms brake maintenance from an awkward two-person chore into a satisfying solo project. With the right preparation, a steady pumping rhythm, and strict attention to the master cylinder fluid level, you can achieve a factory-firm pedal in under an hour.
Start by assembling the kit correctly and testing for vacuum leaks. Work through the recommended bleeding sequence, and never let the reservoir run dry. Store the tool clean and dry after every use, and it will serve you for years. Whether you pair it with a fresh set of pads or a full brake overhaul, this affordable vacuum bleeder gives you professional results on a DIY budget.