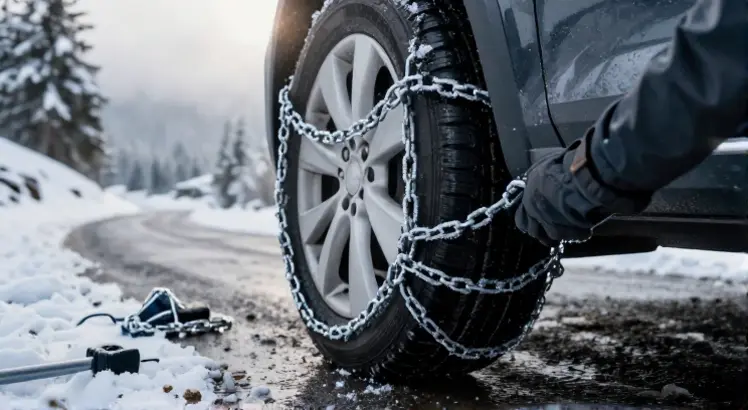
Winter driving can turn dangerous fast when roads get slick, and sometimes all-season tires just are not enough. Knowing how to put snow chains on tires correctly gives you the extra grip you need to stay in control on ice and hard-packed snow. This guide walks you through every step, from preparing the chains to tightening them after a test drive, so you can hit the road with confidence.
Many drivers feel intimidated the first time they unroll a set of chains, but the process is straightforward once you understand the basics. Whether you are heading to the mountains for a ski trip or live where sudden snowstorms are common, mastering chain installation is a smart winter skill. I will also share practical tips, comparisons with other traction devices, and the most frequent mistakes to avoid.
Why You Need Snow Chains

SCC 0232805 Auto-Trac Light Truck/SUV Tire Traction Chain – Set of 2
Check PriceSnow chains dig into frozen surfaces to deliver traction that rubber alone cannot match. On steep grades, icy switchbacks, and unplowed roads, they can be the difference between reaching your destination and getting stuck or sliding off the road. In many mountain passes, carrying chains is a legal requirement during winter months, and you may face fines if you ignore chain control signs.
Even if you own winter tires, chains provide an additional layer of security when conditions turn extreme. They bite through ice, packed snow, and slush, improving braking and steering response. The key is installing them properly, because a loose chain can damage your vehicle and ruin the safety advantage.
Types of Snow Chains Compared

Snow Chains for Car Tires Manual Tightening, Universal Adjustable Emergency Portable Tire Chains, Suitable for Commuter Car and SUV, Set of 2
Check PriceBefore you learn the installation steps, it helps to understand the main styles available. The classic ladder chain uses cross links that create a ladder pattern over the tread, and it provides superb grip but can ride a bit rough. Diamond pattern chains wrap around the tire in a crisscross design, which gives a smoother ride and more even traction, making them a favorite for passenger cars.
Cable chains are lighter and easier to handle, but they offer less aggressive bite than traditional chains. Low-profile or zero-clearance chains use small rollers or a cable mesh to fit cars with limited wheel-well space. If you need help picking the right set for your vehicle, you can check our guide to the best snow chains for car tires, which breaks down top picks for different driving needs.
Some drivers also consider alternative traction devices like snow socks, which are fabric covers that grip snow well and are very easy to put on. However, they wear faster on bare pavement and may not be accepted where chain laws are in effect. For maximum durability and legal compliance, high-quality metal chains remain the go-to choice.
How to Put Snow Chains on Tires: Step-by-Step Instructions

SCC SZ143 Super Z6 Cable Tire Chain for Passenger Cars, Pickups, and SUVs – Set of 2
Check PriceGrab your chains, a pair of work gloves, and a flashlight if it is dark. A kneeling pad or a small tarp can make the job more comfortable when the ground is wet. With everything ready, follow these steps for a secure fit every time.
1. Gather Your Tools and Check Fit
Unpack the chains and untangle them fully. Make sure you have the correct size for your tire dimensions, because chains that are too small will not close and ones that are too large can fly off. Lay the chains flat on the ground and inspect every link, hook, and tensioner for damage before you begin.
2. Park on Level Ground and Turn Off Engine
Find a safe, level spot away from traffic. Engage the parking brake and turn off the engine. If you are on a slope, the vehicle may roll slightly while you work, which is dangerous, so flat ground is essential. For an automatic transmission, put the car in park, and for a manual, leave it in gear or reverse.
3. Lay the Chains Flat and Untangle
Spread each chain out next to its corresponding drive tire. Remove any twists and arrange the cross links so they lie evenly. Identify the inside and outside sides, the inside usually has a hook or clip that attaches near the inner sidewall, while the outside has a tensioning system or a bright-colored fastener.
4. Drape the Chains Over the Tire
Pick up the chain by the inside edge and carefully drape it over the top of the tire. Let the chain hang down evenly on both sides. Push the chain as far around the back of the tire as you can. For a front-wheel-drive vehicle, turn the steering wheel slightly to gain more clearance if needed.
5. Connect the Inside Fastener
Reach behind the tire and connect the inside fastener first. Many chains use a simple hook or a J-hook that you slot into a link. Make sure the connection is secure and that no part of the chain is caught on a brake line or sensor wire. This step is the trickiest because visibility is limited, so take your time.
6. Drive Forward Half a Rotation
Once the inside is attached, get back in the vehicle and drive forward about half a tire rotation, roughly two to three feet. This moves the unfastened part of the chain from underneath the tire to the top. Stop, engage the parking brake again, and turn off the engine before you continue.
7. Secure the Outside Fastener
With the loose ends now accessible, pull the outside chain snug over the tread. Connect the outside fastener, whether it is a lever, cam lock, or hook-and-loop system. You want the chain tight enough that it cannot slip but not so tight that it distorts the sidewall. A properly fitted chain should have a little bit of play in a few links.
8. Tighten and Double-Check
Most chains include a rubber tensioner or a bungee ring that clips across the face of the wheel to keep everything centered. Attach the tensioner and adjust all loose links. Walk around the vehicle and visually confirm that the chains are centered, free of twists, and not rubbing against the fender liner or brake components.
9. Drive a Short Distance and Re-tighten
Pull forward slowly for about 100 yards, then stop in a safe spot and check the chains again. New chains often settle after a short drive, and you may need to take up some slack. Re-tensioning after the initial movement is one of the most important habits for safe chain use, so never skip this final check.
Driving with Chains On: Best Practices

Reusable Snow Tire Chains, 10-Pack Orange Emergency Tire Zip Ties for Snow & Ice – Anti-Skid Traction for Cars, SUVs, Trucks
Check PriceSpeed is your biggest concern when chains are fitted. Most manufacturers recommend staying under 30 miles per hour, and you should never exceed 50 mph even if the chain rating allows it. High speeds can cause chains to break, whipping against the bodywork and causing expensive damage. Accelerate gently, brake earlier than usual, and steer smoothly to avoid losing control.
Listen for unusual noises. A rhythmic thumping or metallic clanking usually means a chain is loose or a tensioner has snapped. Pull over immediately and inspect the setup before continuing. Driving on dry pavement will wear chains out rapidly and reduce their effectiveness on ice later, so only use them on snow, ice, or compacted slush.
Removing Snow Chains Correctly
When you reach clear roads, find a safe place to take the chains off. Release the outside fastener first, then the inside hook. Pull the chain away from the tire and lay it on the ground. Drive forward a few inches to clear the chain completely, then untangle it and let it dry before storing. Wet chains thrown in a bag will rust, shortening their lifespan.
Common Mistakes to Avoid
- Installing chains on the wrong tires. For front-wheel-drive cars, chains go on the front, and for rear-wheel-drive, they go on the rear. All-wheel-drive vehicles typically need chains on all four wheels, but always check your owner’s manual.
- Skipping the re-tightening step. A chain that settles loose can slap the wheel well and snap within minutes.
- Driving too fast. Even a short burst of speed can destroy chains and risk a blowout.
- Using chains that are the wrong size. Always match the chain size to your tire’s specific width, aspect ratio, and rim diameter.
Snow Chains vs. Snow Socks vs. Winter Tires

Snow Chains for Car Tires, 35s Quick Fit & Auto-Tightening, Universal Emergency Anti-Slip Tire Traction Chains for Cars, SUVs & Trucks, Reusable Portable Set of 2 (HKN-120)
Check PriceWhile chains provide the ultimate bite on ice, they require effort to install and must be removed on dry roads. Winter tires are a hassle-free option for daily cold-weather driving, but they do not match the extreme grip of chains in deep snow or on sheer ice. Snow socks sit in the middle, they are quick to mount and work well on packed snow, but they cannot handle extended bare-pavement runs and are often not approved where chain laws apply.
For road trips through mountain passes where chains are mandatory, carrying a set of chains is the only surefire way to stay legal and safe. If you regularly drive in light snow and value convenience, a second set of winter tires paired with chains as backup is a robust strategy. No single solution covers every scenario, but understanding how to put snow chains on tires gives you the flexibility to handle the worst conditions.
Frequently Asked Questions
Do I need chains on all four tires?
Not always. On front-wheel-drive vehicles you put chains on the front drive tires. Rear-wheel-drive cars need chains on the rear. All-wheel-drive models usually require chains on all four tires for balanced traction, but some manufacturers allow chains only on two wheels. Consult your owner’s manual to be sure.
Can I put snow chains on any tire size?
Snow chains are sized to specific tire dimensions. You must match the chain to your tire’s section width, aspect ratio, and wheel diameter. Using an incompatible size can result in chain failure or vehicle damage. If you are unsure, measure your tire or ask a tire shop for help, and you can find additional guidance through Tire Rack’s expert chain installation resource.
How fast can I drive with chains on?
Stick to 30 mph or slower for the safest ride. Even if your chains are rated for higher speeds, the risk of breakage increases dramatically above that threshold. Always follow the speed recommendation printed on the chain packaging.
Why do my chains make noise on clear pavement?
Metal chains are designed to grip snow and ice. On bare asphalt they create a loud, rough ride and will wear out quickly. If you hear excessive clanking or banging, pull over, inspect the tension, and remove the chains as soon as you reach clear roads.
Final Thoughts on Installing Snow Chains
Learning how to put snow chains on tires is a valuable skill that makes winter driving safer and less stressful. When you practice the steps a couple of times in dry weather, you will be much faster and more confident when a storm hits. Always double-check the fit, drive gently, and re-tighten after the first short trip.
Keep your chains clean and dry between uses, and store them in a dedicated bag inside your vehicle so they are always within reach. A little preparation goes a long way, and the peace of mind you get from knowing you can tackle icy roads is well worth the effort.