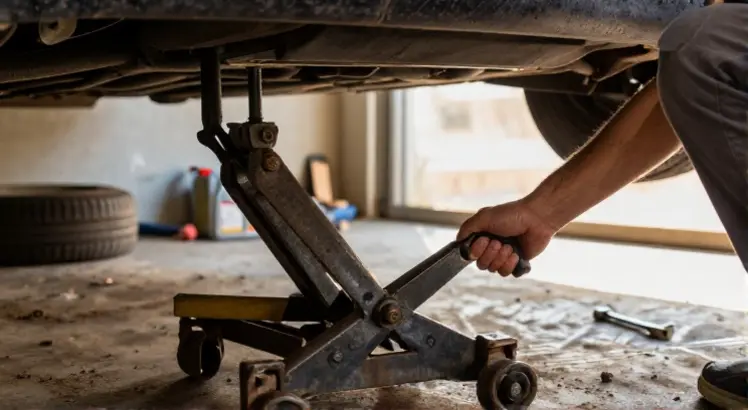
Knowing how to use a scissor jack correctly is an essential skill every driver should own. Whether you are changing a flat tire on the side of the road or performing a quick inspection under your vehicle, the scissor jack is often your first line of defense. Using it improperly can lead to serious injury or vehicle damage. This guide walks you through how to use scissor jack step by step, from locating the right jack points to lowering the vehicle safely.
We designed this article for beginners and intermediate DIYers who want clear, safe instructions. You will learn what a scissor jack is, how to prepare your workspace, and the exact sequence to follow. By the end, you will have the confidence to handle a roadside tire change without panic.
What Is a Scissor Jack and When Do You Use It?
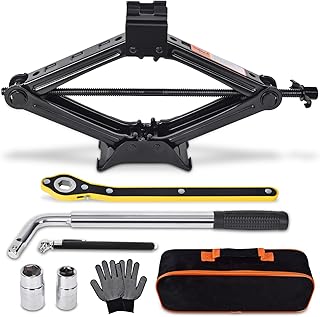
Scissor Car Jack 2 Ton (4409 lbs) Tire Changing Kit with Lug Wrench
Check PriceA scissor jack is a compact, mechanical lifting device found in the trunk of many cars and SUVs. It uses a screw mechanism that expands and contracts, much like a pair of scissors, to raise a vehicle high enough to change a tire. These jacks are lightweight and designed for occasional emergency use, not for daily workshop lifting.
You typically use a scissor jack when you need to lift one corner of your car to swap a flat tire or inspect brakes. They are ideal for roadside emergencies because they take up very little storage space. However, their weight capacity is limited, so they are matched to your vehicle’s curb weight. Always check the rating stamped on the jack before you begin.
Tools and Safety Preparations Before Using a Scissor Jack

Scissor Car Jack 3 Ton (6610 lbs) Tire Changing Kit with Lug Wrench
Check PricePreparation prevents almost all jack related accidents. When you rush the setup, you risk the vehicle slipping off the jack or the jack sinking into soft ground. Spend a few minutes gathering the right gear and assessing your surroundings before you even touch the scissor jack handle.
Gather the Necessary Equipment
- A fully functional scissor jack and its crank handle
- A spare tire with proper air pressure
- A lug wrench or torque wrench
- Wheel chocks (or a sturdy block of wood)
- Reflective warning triangles or flares
- Gloves, a flashlight, and a kneeling pad (optional but helpful)
Before starting your lift, consult your owner’s manual alongside trusted safety resources. For a thorough checklist, refer to official guidelines like AAA’s tire changing guide. Never rely solely on memory, each vehicle has unique lifting requirements.
Check Your Surroundings and Vehicle
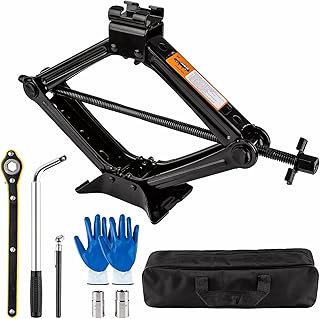
Beaiguna Portable Car Jack Kit, 2 Ton (4409 lbs) Scissor Jack for Car
Check PriceAlways park on a flat, level, and paved surface whenever possible. Turn off the engine, engage the parking brake fully, and place the transmission in park (automatic) or first gear (manual). Set wheel chocks on the opposite end of the wheel that will be lifted, for example, block the front tires if you are raising the rear.
Inspect the scissor jack for visible damage such as bent arms, stripped threads, or a cracked base. A compromised jack can buckle suddenly under load. If the jack looks questionable, do not use it, call roadside assistance instead.
Step-by-Step Guide to Using a Scissor Jack Correctly

IMAYCC Car Jack Kit 2.5 Ton, Universal Scissor Car Jack
Check PriceThis section breaks the process into clear, repeatable actions. Follow each step in order, and never skip the foundational safety checks. Even experienced drivers can benefit from a refresher on the correct sequence.
1. Locate the Correct Jack Points
Jack points are reinforced sections of the vehicle frame designed to handle the concentrated weight of a lifted car. Placing a jack anywhere else can bend a floor pan or crush a brake line. You will usually find the jack points right behind the front wheel wells or just in front of the rear wheel wells, often indicated by a notch, a triangle stamped into the metal, or a plastic pad.
If you are unsure, our detailed guide on where to place a car jack shows exact locations with illustrations. Always double-check against your owner’s manual, as European, Asian, and American vehicles often use different designs. The scissor jack saddle must sit squarely on this reinforced zone.
2. Position the Jack Under the Vehicle
Slide the fully collapsed scissor jack under the jack point so the saddle contacts the frame evenly. The base of the jack must sit flat and level on solid ground. On soft ground like dirt or grass, place a thick plywood board under the jack to spread the load and prevent sinking.
Adjust the jack’s position until it is perpendicular to the ground, not leaning. A tilted jack can kick out as it rises. Once you are satisfied with the alignment, insert the crank handle or wrench into the jack’s drive eye. Ensure the handle can rotate freely without hitting bodywork.
3. Raise the Vehicle Slowly and Steadily
Begin turning the crank in a smooth, constant motion. The scissor arms will start to extend, and you will feel resistance as the saddle meets the frame. Continue cranking until the tire is just barely off the ground, usually about two inches of clearance is enough to remove the wheel.
Resist the temptation to lift higher than necessary. The higher the jack extends, the less stable it becomes. While lifting, watch the jack base and the saddle continuously. If the vehicle shifts or the jack starts to lean, stop immediately, lower it completely, and reposition everything.
4. Place Jack Stands (If Applicable)
Never crawl under a vehicle supported only by a scissor jack. Scissor jacks are for lifting, not for holding. If you plan to inspect brakes or perform any undercar work after removing a tire, immediately slide a jack stand under a solid frame rail and set it to support the load. This adds a vital backup layer of safety.
For a standard tire change, you can work without jack stands as long as you never place any part of your body under the vehicle. However, using a jack stand is a best practice that experienced mechanics never skip. Lower the scissor jack slightly so the vehicle’s weight rests on the stand, then give the stand a firm shake to confirm it is seated securely.
5. Lower the Vehicle Safely
Once the new or repaired wheel is back on and the lug nuts are snug, it is time to lower the vehicle. If you used a jack stand, raise the scissor jack just enough to remove the stand first. Then, insert the crank handle and turn it in the opposite direction, letting the vehicle descend slowly and in a controlled manner.
Avoid rapid lowering that could jolt the suspension or cause the jack to slip off the jack point. Remove the jack completely, then fully torque the lug nuts in a star pattern with the vehicle on the ground. Double-check all tools are stowed, and release the parking brake only after you are certain everything is secure.
Common Mistakes to Avoid When Using a Scissor Jack

Scissor Jack 3 Ton, 4.1″-18.3″ Lifting Car Jack, Heavy Duty Car Jack Kit
Check Price- Lifting on an uneven or soft surface without a solid base plate, causing the jack to sink or tip.
- Placing the jack saddle on a suspension component, floor pan, or the body seam instead of the designated jack point.
- Overextending the scissor jack beyond its maximum height, which puts the screw mechanism under dangerous strain.
- Leaving a vehicle supported only by the jack and then shaking it forcefully to break a stuck wheel.
- Ignoring the parking brake and wheel chocks, which can allow the car to roll as the jack lifts.
Taking shortcuts is never worth the risk. Even a low height fall of a vehicle can cause a crush injury to a hand or foot. A disciplined, methodical approach always leads to a safer outcome.
Scissor Jack vs. Other Jack Types: Pros and Cons
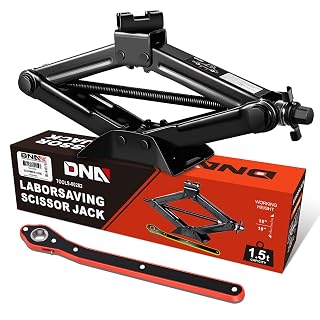
DNA Motoring Scissor Jack for Car, 1.5 Ton (3,306 lbs) with Ratchet Wrench
Check PriceScissor jacks serve a specific purpose, but they are not the only option. Understanding how they compare to floor jacks and bottle jacks helps you decide when to upgrade or use a different tool.
A scissor jack is lightweight, compact, and cheap, making it perfect for the trunk of a daily driver. However, it has a low lifting capacity and requires physical effort. A hydraulic floor jack lifts quickly with less effort and is far more stable, but it is heavy and takes up a lot of space. Bottle jacks offer high lifting force in a small package and work well for trucks, yet they have a smaller base and a higher minimum saddle height that may not fit under low clearance cars. For roadside emergencies, the scissor jack remains the most logical factory supplied tool.
Maintenance Tips to Keep Your Scissor Jack Reliable
A scissor jack can seize or weaken over time if it never receives attention. Simple maintenance ensures it turns smoothly when you need it most. Periodically remove the jack from its storage compartment and clean off dirt, road salt, and grime. Inspect the threaded rod and lubricate it with a light coat of white lithium grease or dry lubricant. Avoid heavy grease that attracts sand.
Check the saddle and base for rust or deformation. Surface rust can be scrubbed off and painted, but any crack or bend means the jack must be replaced immediately. If your original scissor jack is missing or damaged, consider an upgraded replacement. We have compared top rated models in our roundup of the best scissor jack for your car to help you choose a sturdy, reliable unit.
Frequently Asked Questions
Can I use a scissor jack on a slope or unpaved ground?
It is extremely dangerous to use any jack on a slope. The vehicle can slide, and the jack can tip. If you must use it on a gravel or dirt shoulder, place a wide, sturdy board under the base to distribute weight and reduce sinking. Still, a flat, paved surface is always the safest choice.
How much weight can a scissor jack lift?
Most factory scissor jacks are rated for the specific vehicle they come with, usually between 1 and 2 tons (2,000 to 4,000 pounds). Never exceed the rating stamped on the jack. Lifting an axle weight that exceeds the limit can cause sudden failure.
Do I need to use jack stands with a scissor jack?
If you are only changing a tire and will never place any body part under the vehicle, many roadside guides say jack stands are not mandatory. However, for any undercar inspection, stands are non-negotiable. Using a jack stand as a backup is always a wise safety investment.
Why does my scissor jack feel stiff or hard to turn?
Stiff operation usually indicates corrosion, dirt in the screw threads, or lack of lubrication. Clean the threaded rod and apply a dry lubricant. If the problem persists and the rod looks bent, stop using it and replace the jack.
Conclusion
Learning how to use scissor jack properly is not just about changing a tire, it is about taking control of a stressful situation with calm preparation. The steps are straightforward: find the jack point, set a stable base, lift just enough, support with a stand when needed, and lower with precision. Every single one of these actions builds a safety barrier between you and a potentially dangerous mishap.
Practice this routine in your driveway on a clear day before you ever need it at night or in the rain. Familiarity turns a daunting task into a manageable one. Bookmark this guide and review the linked resources on jack points and scissor jack upgrades to keep your equipment ready. A humble scissor jack, when used correctly, remains one of the most reliable tools in your car’s emergency kit.