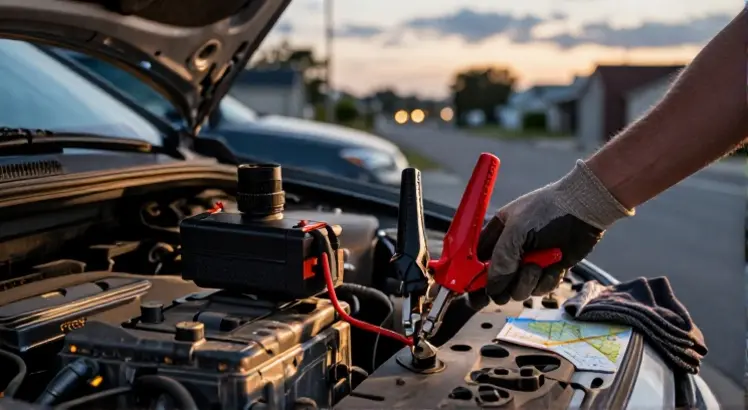
A dead car battery rarely happens at a convenient time. Whether you are stranded in a dark parking lot or rushing to an early meeting, knowing exactly how to use a battery jump starter can turn a stressful morning into a quick fix. A portable jump starter, often called a jump pack, puts you in control without needing another vehicle or long jumper cables. This guide walks you through every step of the process, from choosing the right unit to safely reconnecting clamps, so you never feel helpless again when your battery quits.
Modern lithium-ion jump starters are compact enough to stow in your glovebox, yet powerful enough to crank a full-size truck. But holding that little box in your hand can feel intimidating if you have never used one. The good news is that the procedure is straightforward once you understand the safety logic. By the time you finish reading, you will know exactly how to use a battery jump starter without second-guessing, and you will pick up a few pro tips that make the process even smoother.
Before we dive into the step-by-step instructions, it helps to understand what a jump starter does and why the order of connections matters. That foundational knowledge builds the confidence you need to act quickly when your battery fails.
What Is a Portable Battery Jump Starter?

NOCO Boost GB40 12V 1000A
Check PriceA portable jump starter is a rechargeable battery pack that delivers a short, high-current burst to spin your engine’s starter motor. Unlike traditional jumper cables, which rely on a donor car’s electrical system, a jump pack carries its own energy source and typically uses lithium-ion cells. Most modern units pack enough cranking amps for multiple starts on a single charge and come with safety features like reverse-polarity alarms, spark-proof clamps, and USB ports that also let you charge phones.
Inside that tough plastic shell, you will find a battery, a control board, and heavy-duty alligator clamps color-coded in red for positive and black for negative. The built-in microprocessor constantly monitors voltage and temperature, preventing the kind of damage that old-school boosters could cause. This smart technology makes learning how to use a battery jump starter safer than ever, even for someone with zero mechanical experience.
Because jump starters come in various sizes, it helps to match the unit to your vehicle type. A four-cylinder sedan needs fewer peak amps than a diesel pickup. If you are still shopping for the right unit, our guide on choosing the correct car battery for your vehicle will help you understand the electrical demands you are dealing with.
Why You Should Own a Jump Starter

JOLTEKON 4500A with Air Compressor
Check PriceIndependence is the biggest reason. Without a jump pack, a dead battery forces you to rely on the kindness of strangers or wait for roadside assistance. A portable jump starter eliminates both delays. You can park anywhere without worrying about nose-to-nose positioning, and you do not need another car idling inches from your bumper.
Cold weather drains batteries aggressively. When temperatures plummet, your battery’s chemical reaction slows down, and a unit that seemed fine in autumn may struggle on a frosty morning. Keeping a jump starter in your trunk is a winter survival essential. For deeper insight into winter preparation, take a look at our article about reliable battery chargers for cold weather, which covers tools that complement a jump pack beautifully.
Many jump starters also work as multi-function power banks. They recharge laptops, run 12-volt accessories, and include built-in LED flashlights with SOS modes. This versatility means your investment pays for itself, even on road trips where you never need a jump.
Safety Precautions Before Using a Jump Starter

GOOLOO A3 Jump Starter with Air Compressor
Check PriceEven though modern jump packs are loaded with safeguards, electricity demands respect. Following a few common-sense precautions will keep you, your vehicle, and your jump starter safe every time.
Read the Manual
Every jump starter has unique quirks. Some require you to press a boost button before turning the ignition, while others detect connection automatically. Skim the quick-start card that came with your device and store it in the glovebox. If you lost the paper copy, download the PDF from the manufacturer’s website and save it on your phone.
Wear Protection
You do not need a hazmat suit, but safety glasses protect your eyes from sparks, and sturdy gloves shield your hands from hot engine components. In winter, insulated gloves that still allow finger dexterity are ideal.
Check for Damage
Never use a jump starter if the clamps are corroded, the cable insulation is frayed, or the pack is swollen. Lithium batteries that puff up or leak must be recycled immediately. Give your unit a quick visual inspection once a month, just like you check your tire pressure.
Ventilate the Area
Lead-acid batteries can release hydrogen gas, especially when deeply discharged. Jump-start in an open space or at least raise the hood and let fresh air circulate for 30 seconds before attaching clamps. This tiny habit dramatically lowers any risk of ignition.
How to Use a Battery Jump Starter: Step-by-Step Instructions

OXILAM Jump Starter 6000A
Check PriceHere is the heart of the guide, a clear, repeatable routine that works for 99% of consumer jump starters. Follow these steps in order and you will get back on the road safely.
Step 1: Prepare Your Vehicle and Jump Starter
Set the parking brake and turn off all accessories: lights, radio, air conditioning, and phone chargers. If your key has an off position, switch it there and remove the key. Transmission in park (automatic) or neutral with the parking brake (manual) is non-negotiable.
Make sure your jump starter is fully charged. A half-charged unit may lack the punch needed on a cold morning. Most packs display charge level via LED bars, so glance at it before you need it.
Step 2: Connect the Clamps to the Battery
Locate the battery. In many cars it sits in the engine bay, but some models hide it in the trunk or under the rear seat. A few vehicles provide remote positive and negative terminals under the hood for easier access. Identify the positive terminal, marked with a plus sign (+) and often covered by a red cap, and the negative terminal, marked with a minus sign (-).
- Attach the red clamp to the positive (+) battery terminal first.
- Attach the black clamp to the negative (-) battery terminal.
- If your manual instructs you to connect the black clamp to an unpainted metal ground away from the battery instead of the negative post, follow that advice. It is an extra safety step for certain boosters.
Wiggle each clamp gently to ensure a solid bite. Look for any hidden corrosion. If the terminals are crusty, twist the clamps slightly to scrape through the layer and achieve good metal-to-metal contact. Most jump starters will sound an alarm or flash a warning if you accidentally reverse the polarity, so if you hear beeping, swap the clamps immediately.
Step 3: Power On the Jump Starter
Turn on the jump starter if it has a dedicated power button. Some models enter ready mode as soon as the clamps are connected correctly. Wait for the green or ready indicator light. Do not attempt to start the car until you see that signal.
Step 4: Start the Vehicle
Crank the engine just as you normally would, turning the key or pressing the start button for no more than 3 to 5 seconds. If the engine does not catch, wait at least 30 seconds before a second attempt. This rest period lets the jump starter’s internal circuitry cool and your car’s starter motor rest.
After two or three unsuccessful tries, stop. Repeated cranking may harm the jump pack or indicate a deeper problem, such as a failed starter or corroded cable, rather than a simple dead battery.
Step 5: Disconnect Properly
Once the engine is running smoothly, immediately disconnect the clamps in the reverse order of connection. Remove the black (negative) clamp first, then the red (positive) clamp. Tuck the clamps away and do not let them touch each other or any metal part of the car.
Let the engine run for at least 15 to 20 minutes or take a moderate drive so the alternator can replenish the battery. Avoid shutting the engine off until you are sure the battery has absorbed a decent surface charge.
Common Mistakes to Avoid When Jump-Starting

S ZEVZO ET03 4000A
Check PriceEven seasoned drivers make errors under pressure. Knowing the typical pitfalls keeps you from becoming a cautionary tale.
- Reversing the clamps. Red goes to positive, black to negative. Reversal can blow fuses or damage the jump starter’s circuitry.
- Leaving the jump starter connected after the engine fires. Once the engine runs, the alternator pushes voltage back. Disconnect quickly to protect the pack.
- Using an underpowered unit. A tiny 400-amp pack meant for a motorcycle cannot reliably crank a V8 truck. Match peak amps to your engine size.
- Ignoring a bloated or damaged pack. A swollen lithium jump starter is a fire risk. Do not attempt to use it, and recycle it properly.
- Skipping the cooldown between attempts. Crank, wait, then try again. Hammering the starter without pause overheats motors and drains the pack.
How to Choose the Right Jump Starter

TREKURE Portable Jump Starter 4000A
Check PriceIf you are still shopping, focusing on peak amps, battery chemistry, and safety features will guide you to a best related battery Jump Starter.
Peak Amps vs. Cranking Amps
Manufacturers love to highlight peak amps, but that number represents a short burst in ideal lab conditions. Cranking amps (CA) or cold cranking amps (CCA) give a more honest picture of real-world performance. As a rule of thumb, look for at least 400 CCA for a four-cylinder engine and 600 CCA or more for V6 and V8 engines. Diesel engines often need 800 CCA and above.
Battery Capacity and Features
Lithium iron phosphate (LiFePO4) packs last longer and tolerate temperature swings better than standard lithium-ion, though they cost a bit more. Also check for a built-in flashlight, USB-C charging, and reverse-polarity alarms. These features make learning how to use a battery jump starter even more forgiving.
Amp hours (Ah) or watt hours (Wh) tell you how many jumps you can get per charge. A 12,000 mAh unit might deliver 20 or more starts on a small sedan. If you drive a heavy-duty truck, invest in a high-capacity model and recharge it quarterly.
Maintaining Your Portable Jump Starter
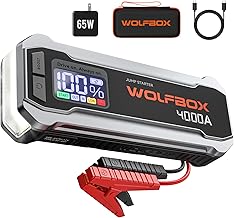
WOLFBOX 4000A Jump Starter
Check PriceA jump starter is a piece of emergency gear. If you treat it like a forgotten gym bag, it will fail when you need it most. Set a calendar reminder to top off the charge every three months. Lithium cells slowly self-discharge, and letting them sit at zero for months can destroy the battery management system.
Store the unit in a cool, dry place. Extreme heat, like a closed car in summer, degrades lithium batteries faster than anything else. During winter, keep the pack inside your home overnight and bring it to the car in the morning, especially if you know the battery is weak.
Clean the clamps with a dry cloth after each use. If you see green or white corrosion, use a small wire brush and a dab of baking soda paste, then dry thoroughly. A little care here ensures a solid connection next time.
Frequently Asked Questions

NOCO Boost GB70 2000A
Check PriceCan I use a jump starter on a completely dead battery?
Yes. Most jump starters work even when the battery voltage is too low to light the dashboard. Some models have a manual override or force start mode for deeply discharged batteries. Check your manual before using this feature, and be aware that a battery sitting at zero volts for a long time might be permanently damaged.
Is it safe to jump-start in the rain?
Rain itself is not as dangerous as it looks because water is not a strong conductor of 12-volt electricity. The bigger risk is slipping or dropping a metal tool across battery terminals. If you must jump-start in wet weather, stand on a dry surface if possible, wear rubber-soled shoes, and keep the jump starter under a hood or umbrella. Avoid handling wet clamps with bare hands if you feel any tingle, though that is extremely rare.
How often should I recharge my jump starter?
Recharge every 90 days when not in use, even if the indicator still shows a full charge. After a jump-start event, recharge it fully as soon as you reach your destination. Leaving it partially drained shortens its overall lifespan.
Can I jump-start a diesel engine with a portable unit?
You can, but you need a heavy-duty jump starter rated for diesel compression. Look for units explicitly specifying large diesel compatibility, often with peak amps above 2000. Smaller packs may start a diesel in warm weather, but on a cold morning they will struggle. Always match the unit to the engine’s displacement and glow plug demands.
Conclusion

JOLTEKON 6000A 9-in-1 with Air Blower
Check PriceKnowing how to use a battery jump starter takes the fear out of a dead battery. It is a simple sequence: prepare, connect red then black, power on, crank, and disconnect in reverse. Once you practice it once or twice, the muscle memory sticks. The key is to respect the equipment, maintain the charger, and never rush when clamps are near terminals.
If you drive in freezing temperatures, a quality jump pack is just one piece of the puzzle. For even colder climates, our recommendations for reliable battery chargers for cold weather will help you keep your battery at peak health all winter long. Remember, the best jump start is the one you never need, and regular battery maintenance gets you there.
Next time your dashboard stays dark, you will reach for that compact box with confidence. Trust the process, follow the safety steps, and you will be back on the road in minutes.