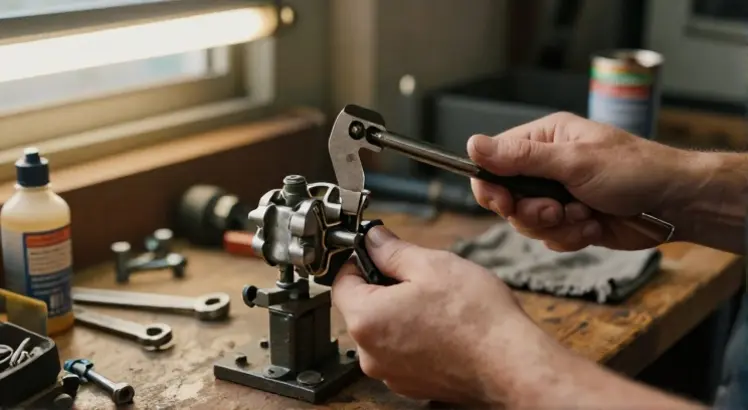
Knowing how to use caliper piston tool is the single skill that turns a frustrating brake job into a straightforward weekend project. When you replace brake pads, the caliper piston must be pushed back into its housing to make room for the thicker, new pads. Without the right technique, you risk damaging the piston, tearing the dust boot, or even ruining the caliper itself. This guide breaks down everything you need to work with both push-back and twist-in caliper pistons, no matter your experience level.
What Is a Caliper Piston Tool and Why Do You Need One?

Orion Motor Tech 24pc Brake Caliper Compression Tool Set
Check PriceA caliper piston tool is a device designed to retract the brake caliper piston safely and evenly. During normal driving, your brake pads wear thinner and the piston gradually extends outward. When you install fresh pads, the piston sits too far out to fit over the new, thick friction material. Prying it back with a screwdriver or a C-clamp might work in a pinch, but those shortcuts can gouge the piston surface or cock it sideways inside the bore.
The right tool applies straight, controlled force without damaging surrounding components. It also saves you from the headache of a spongy brake pedal caused by a misaligned piston. Whether you have a simple front caliper or a rear caliper that integrates the parking brake, using a proper caliper piston compressor keeps the job clean and professional.
Types of Caliper Piston Tools

MAYESAR Brake Caliper Compression Tool
Check PriceBefore you learn how to use caliper piston tool, you need to match the tool to your caliper design. Broadly, there are two families of tools, and picking the wrong one leads to stripped pistons and wasted time.
Push-Back Caliper Piston Tools
Push-back tools use a threaded clamp mechanism or a large lever to slowly press the piston straight into the caliper bore. These work on floating calipers found on most front brakes and some rear brakes without an integrated parking brake mechanism. A simple caliper piston spreader plate attached to a forcing screw is the most common design. You can also find plier-style tools that squeeze the piston back, but they often lack the smooth control of a dedicated compression tool.
Twist-In Caliper Piston Tools
Many rear calipers use a threaded parking brake actuator. These pistons must be rotated clockwise while being pressed inward. Forcing them straight back without twisting will damage the internal mechanism and ruin the caliper. A twist-in tool has a notched or toothed adapter that engages the piston face, allowing you to spin and push simultaneously. Most universal caliper tool kits include several adapters for Ford, Honda, Mazda, Volkswagen, and other common applications.
If you are unsure which style your car uses, a quick glance at the piston face gives you the answer. A smooth, flat piston typically pushes back, while a piston with two or four notches on the face almost always requires rotation. Investing in a quality kit like a right brake caliper compression tool makes the distinction painless because it includes both push-back plates and twist-in adapters.
How to Use a Caliper Piston Tool: A Complete Walkthrough

8MILELAKE Disc Brake Caliper Compressor Wind Back Tool 24pc
Check PriceBelow you will find separate methods for the two piston types. Always consult your vehicle service manual for torque specs and any special steps, but the core process remains consistent across most makes and models.
Method 1: Using a Push-Back Caliper Piston Tool (Front and Simple Rear Calipers)
- Secure the vehicle. Park on a level surface, set the parking brake, and loosen the lug nuts before jacking up the car. Support it with jack stands.
- Remove the caliper from the bracket. Unbolt the caliper guide pin bolts and slide the caliper off the rotor. Do not let the caliper hang by its rubber hose. Bungee it to the coil spring or use a caliper hanger.
- Extract the old brake pads. Pop them out of the bracket. Note the position of any anti-squeal shims.
- Open the brake fluid reservoir. Crack the master cylinder cap under the hood. This relieves pressure and prevents backflow damage to the ABS module. Wrap a rag around the reservoir to catch any overflow as the piston retracts.
- Position the push-back tool. Place the steel plate of the caliper compression tool against the piston face. Align the forcing screw with the outer body of the caliper. Some tools require you to use the old brake pad as a pressing plate, a handy trick that distributes pressure evenly.
- Compress the piston slowly. Turn the threaded handle clockwise with a ratchet or a T-bar. Go slow and watch the dust boot. If it begins to twist oddly, back off and reseat the tool. The piston should retreat into the bore smoothly and completely until it is flush with the housing.
- Reinstall the caliper. Once the piston is fully seated, mount the new pads, slide the caliper back over the rotor, and torque the guide pin bolts to spec. Pump the brake pedal firmly several times before driving to push the piston back to the pads.
Method 2: Using a Twist-In Caliper Piston Tool (Rear Calipers with Parking Brake)
- Set up your workspace. Follow the same safety steps: secure the vehicle, remove the caliper, and open the master cylinder cap. On some cars, you need to release the electronic parking brake with a scan tool or manual procedure. Check your owner’s manual.
- Choose the correct adapter. A universal twist-in tool comes with a cube-shaped adapter or a disc with multiple pin patterns. Match the pin layout to the notches on your piston. If you have a dedicated kit like the high-quality caliper tool kit from Orion Motor Tech, the right adapter clicks onto the magnetic forcing screw effortlessly.
- Engage the piston notches. Slide the adapter into the caliper and push the pins firmly into the piston’s grooves. The tool must sit square against the piston face.
- Apply steady inward pressure while turning. Rotate the tool’s handle clockwise. At the same time, maintain gentle forward pressure to guide the piston into the bore. The combination of spin and push is what threads the piston back onto the internal parking brake mechanism.
- Watch the dust boot alignment. As the piston turns, the rubber dust boot may try to bunch up. Pause frequently and use a small plastic trim tool to tuck the boot back into place if needed.
- Fully seat the piston. Stop when the piston is flush with the caliper body and the alignment notches are oriented correctly to accept the pad’s pin or dimple. If not, rotate the piston slightly to align the notches without forcing it further in.
- Reassemble and test. Place the new pads, reattach the caliper, and torque everything. Pump the brake pedal until the pedal feels firm. A quick, safe test drive around the block confirms everything works.
If you want to see the entire brake pad replacement process in context, including caliper compression, you can follow a comprehensive brake pad replacement walkthrough from a trusted source alongside this guide.
Common Mistakes to Avoid When Using a Caliper Piston Tool

Orion Motor Tech Speedy Brake Caliper Compression Tool
Check PriceEven with the right tool in hand, a small oversight can lead to uneven pad wear, noise, or brake fluid leaks. Keep these points at the front of your mind while you work.
- Forcing a twist-in piston straight back. If you compress a threaded rear piston without rotating it, the internal adjuster can seize or snap. You will need a new caliper, no way around it.
- Neglecting to open the master cylinder cap. Sealed fluid pressure can make compression nearly impossible and may blow out the reservoir seals. Always crack the cap.
- Letting the caliper hang by the hose. The rubber brake hose is not designed to support weight. Hanging the caliper can stretch the hose internally or cause a tear.
- Pushing the dust boot into the piston bore. Inspect the boot after compression. If it is pinched or pushed inside, moisture and dirt will quickly corrode the piston bore.
- Skipping the brake pedal pump. Before starting the engine, pump the brake pedal several times to seat the pads against the rotor. A low pedal on the first press can scare you, but it is normal until the system is pressurized again.
When to Replace the Caliper Instead of Just Using the Tool

Brake Caliper Compression Tool – One-Handed 360° Ratchet
Check PriceA caliper piston tool is only effective when the caliper itself is healthy. If you notice any of these warning signs, stop and consider a replacement caliper assembly instead of fighting a stuck piston.
- Fluid leaking from the dust boot or around the piston seal.
- Excessive rust or pitting on the piston surface.
- A piston that refuses to compress even with the correct tool, indicating internal binding.
- Torn or missing dust boot that allowed debris inside the caliper bore.
Compressing a compromised piston can push contaminated fluid back into the ABS module, a repair far more expensive than a new caliper. When in doubt, a remanufactured or new caliper keeps your braking system reliable.
FAQs About Using a Caliper Piston Tool

BILITOOLS Brake Caliper Compression Tool, 22-Piece
Check PriceCan I use a C-clamp instead of a caliper piston tool?
You can use a C-clamp for front calipers with a smooth, non-threaded piston in an emergency. Place the old brake pad against the piston face as a buffer to avoid gouging the metal. However, a C-clamp provides uneven pressure and easily slips, making a dedicated tool safer for consistent results. Never use a C-clamp on a rear caliper that requires rotation.
Which caliper piston tool works on all cars?
A universal caliper compression kit with both push-back plates and a multi-adapter twist-in set covers most vehicles on the road. Look for a kit that includes magnetic adapters and a left-hand/right-hand threaded forcing screw to accommodate different caliper orientations.
Do I need to bleed the brakes after using a caliper piston tool?
Not normally. Simply pushing the piston back does not introduce air into the system unless you opened a bleeder valve or the fluid level dropped too low. If you compressed the piston without opening the master cylinder cap, or if the fluid was extremely contaminated, a fluid flush is good insurance.
What is the difference between a left-hand and right-hand caliper tool?
Some rear brake calipers on European cars thread in the opposite direction. A right-hand twist tool turns clockwise to retract, while a left-hand tool turns counterclockwise. Universal kits include both thread directions, a crucial feature if you work on multiple vehicle brands.
Putting It All Together

Orion Motor Tech Dual Piston Brake Caliper Compressor
Check PriceLearning how to use a caliper piston tool unlocks the ability to change your own brake pads with confidence. You protect your calipers, prevent damage to brake hardware, and gain a skill that pays for itself after just one DIY brake job. Start by identifying your piston type, choose the matching push-back or twist-in tool, and follow the methodical steps without rushing. Work cleanly, avoid the common mistakes listed above, and your brakes will feel firm and responsive from the very first stop.
The small investment in a quality caliper compression kit delivers precision that home-brew solutions simply cannot match. Treat your tools with care, refer to your vehicle’s specifications, and you will complete brake service that rivals a professional shop, all from your own garage.